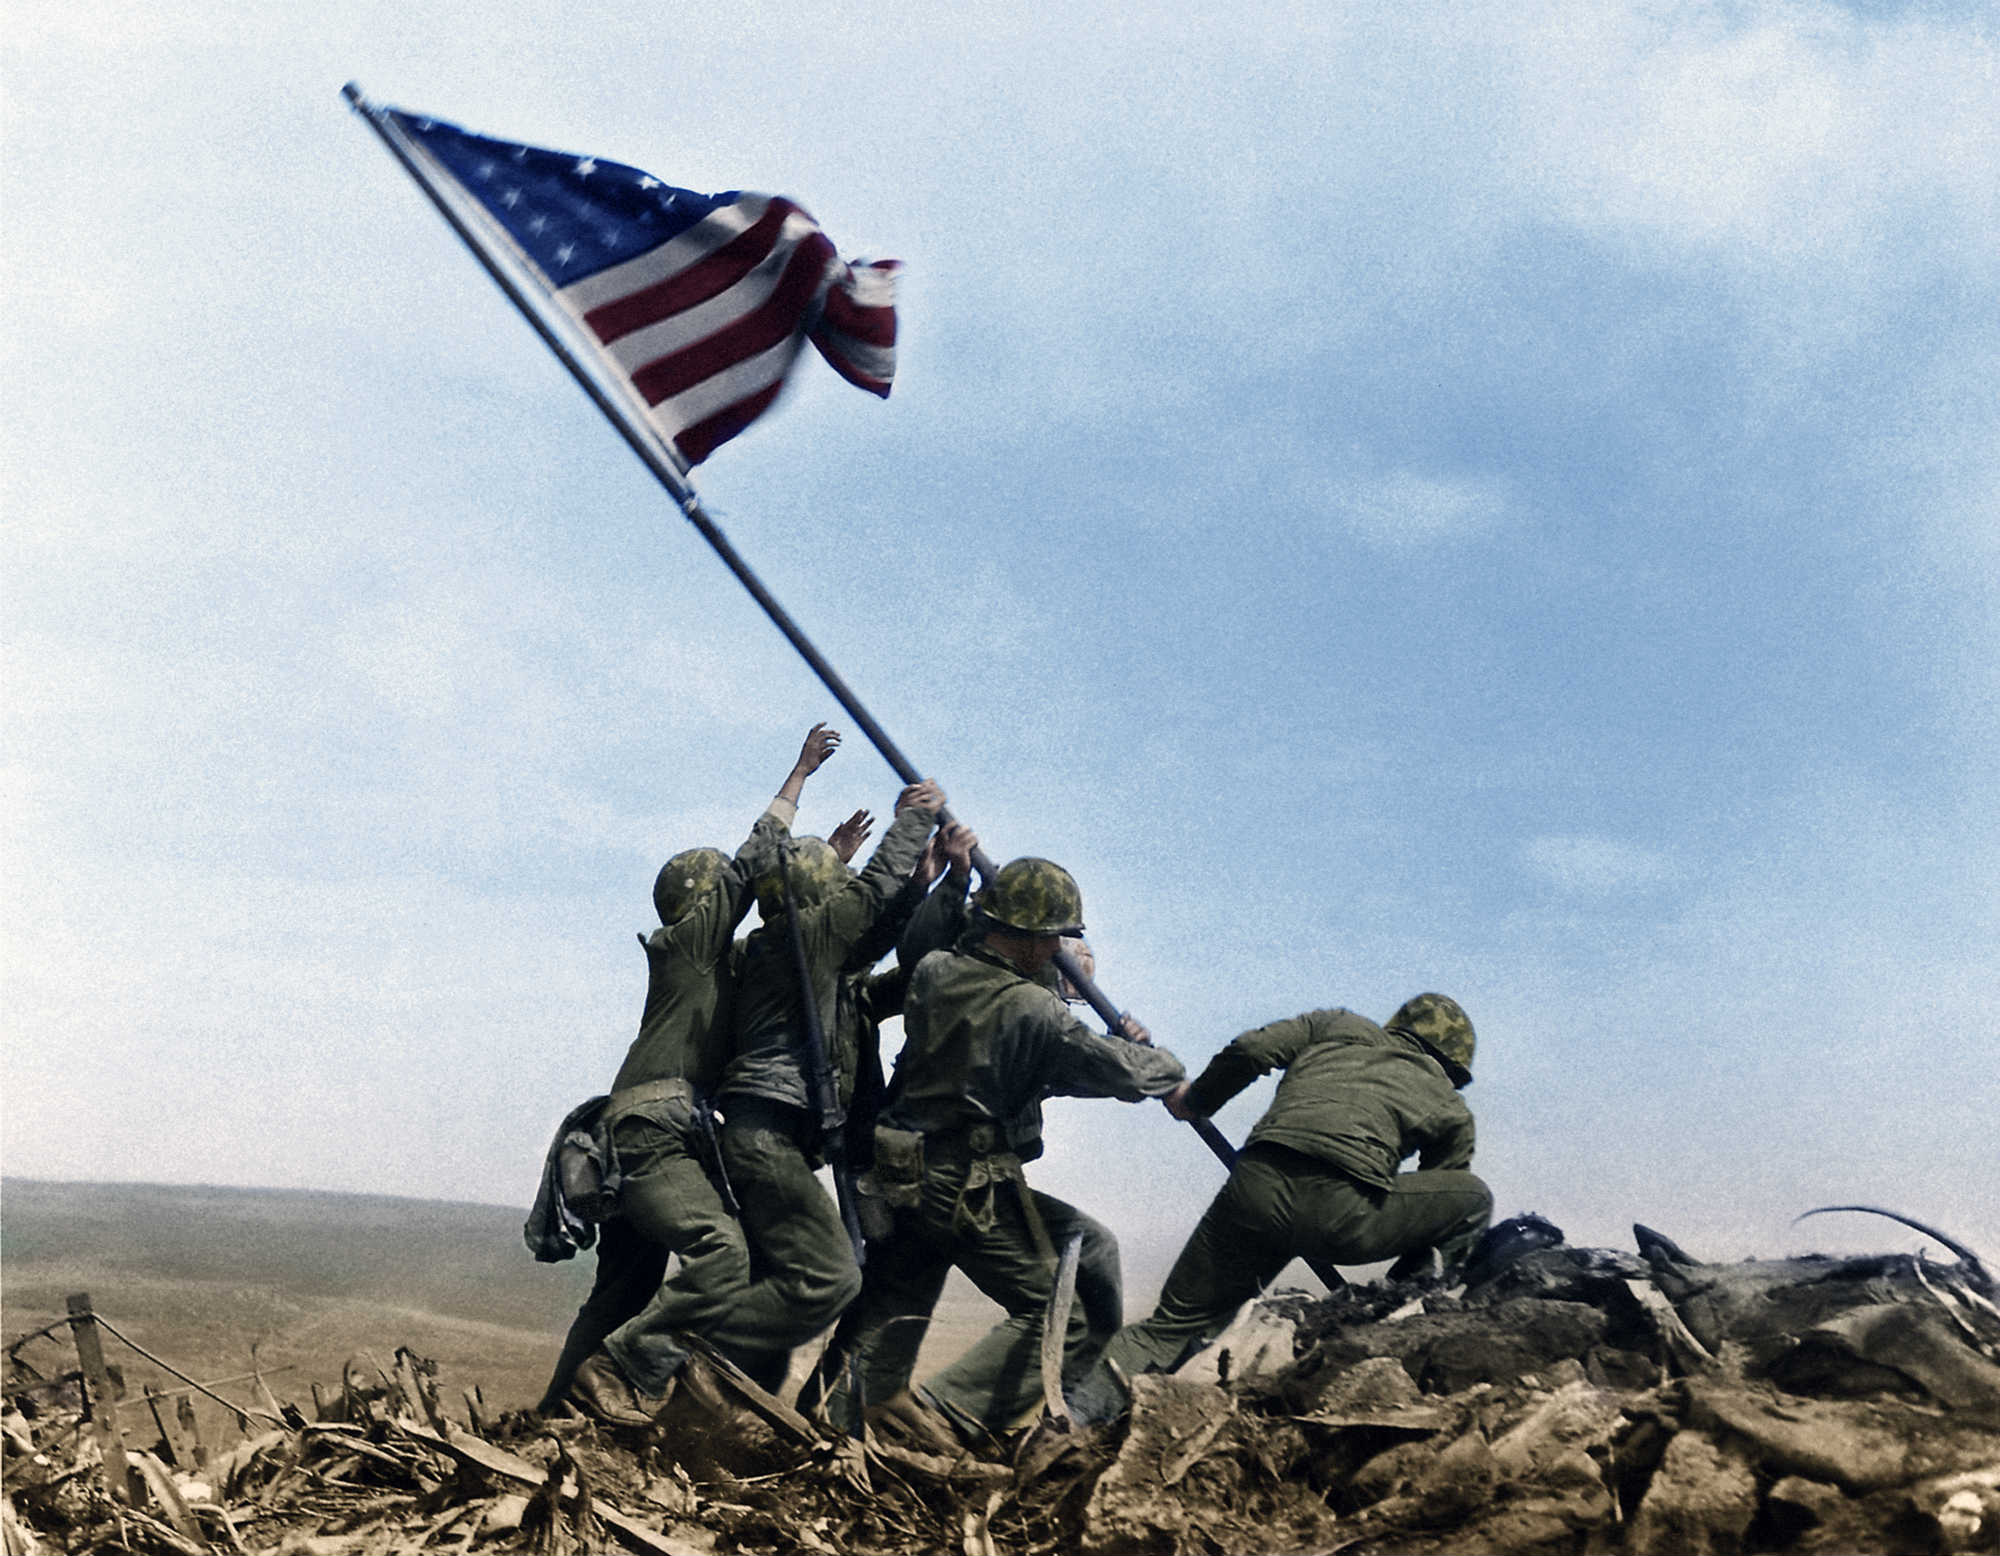
When you think of iconic images in history, the chances are good that you probably think of photos like Joe Rosenthal’s image of American troops raising the flag on Iwo Jima (shown above) or Malcolm Browne’s photo of a monk setting himself on fire in Vietnam or Marilyn Monroe’s famous pose over a subway grate. Learn more about when were cameras invented on our website PhotographyTalk.com.
These images – and many more – captured moments that are emblazoned in our collective memory.
But these images were also originally captured in black and white.
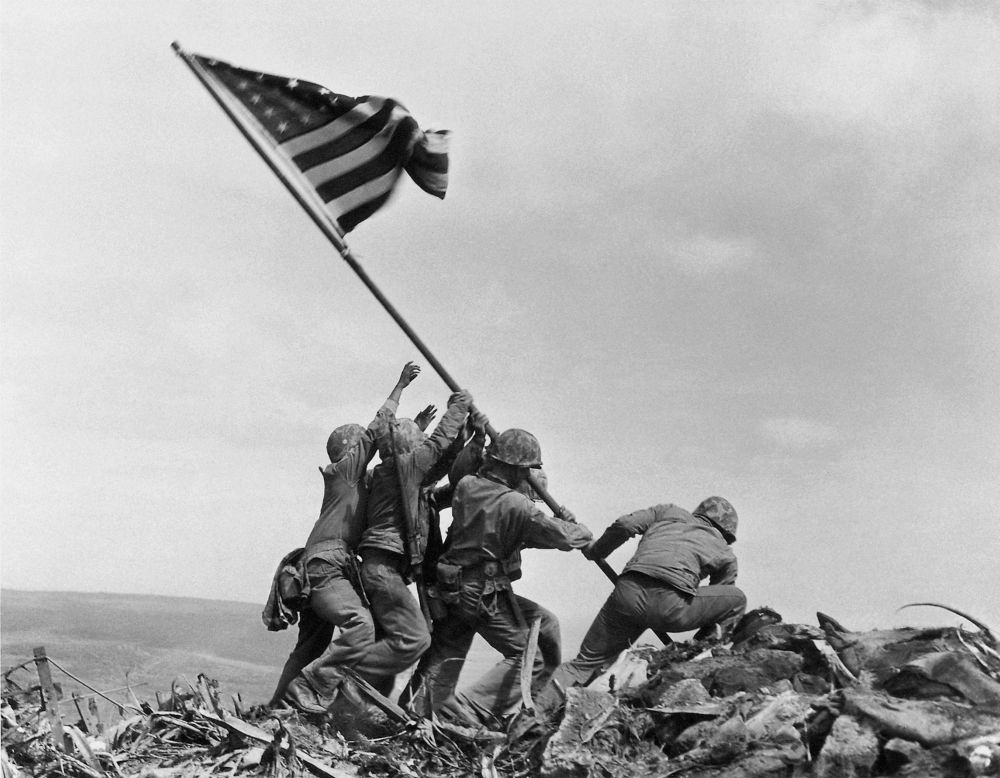 “Raising the Flag on Iwo Jima.” Photographed on February 19th, 1945 by Joe Rosenthal, courtesy of Associated Press.
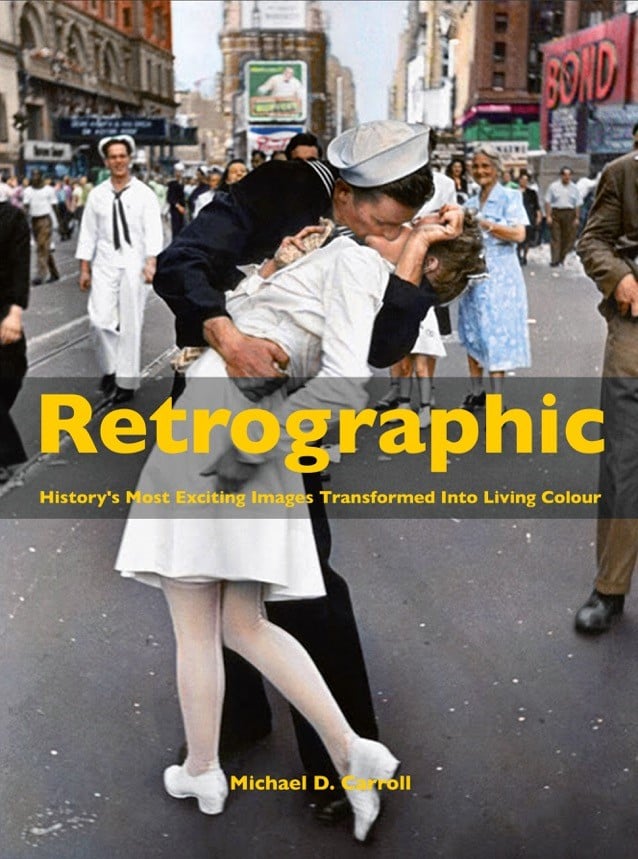
Now, these photos are presented in living color in a new book Retrographic (now available on Amazon) a labor of love by 38-year-old author and journalist Michael D. Carroll of Birmingham, England.
By carefully selecting some of the most striking images ever taken, Carroll’s Retrographic takes you on a visual tour of the past, time capsules collected together for the first time and in living color.
This is the story of how this incredible book came to be.
The Motivation Behind Retrographic
The purpose of the book is to present historical images – and history itself – in a way that’s accessible to the widest possible audience.
Presenting these images in color and in the context of the stories behind the moments captured on camera allows people young and old to experience history like never before. You can also view another post about photo timeline here.
The brainchild of Michael D. Carroll, Retrographic came about as he researched stories from the past. During his research, he happened upon an online community of image colorizers – some amateur and some professional – who brought new life to even the most famous black and white images.
Video by Retrographic/ Carpet Bombing Culture
These colorists show the utmost respect for the original images as well as the photographers who captured them. Additionally, they demonstrate sympathy for the subjects in the images.
Beyond that, these colorizers spent countless hours dedicated to researching the authentic colors that the original photographers would have likely seen when the moment occurred.
In that regard, Retrographic is a team effort to bring history to life in a new and colorful way. That includes not just the words of Carroll but the tireless work of the colorizers – spearheaded by Doug Banks via the Facebook page Colorizing History.
Selecting the Images
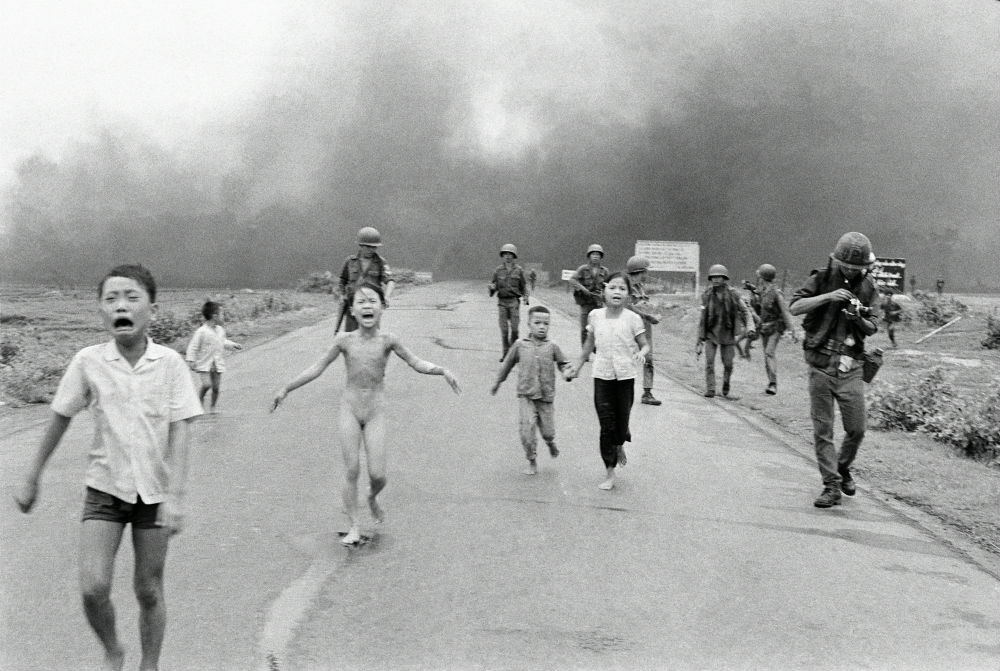 Not in our name: the anti-war image is born in the moment this badly burned girl cries out in pain. “Napalm Girl” Phan Thi Kim Phuc. Photographed by Nick Ut outside Trang Bang Village, Vietnam, June 8th, 1972, courtesy of the Associated Press (AP).
Naturally, Carroll and the team of colorizers couldn’t incorporate every image that spoke to them into the book. Otherwise, it would have been an anthology of thousands of images.
Instead, the focus was turned to well-known and iconic images (120 of them in total) that have the power to capture people’s attention and speak directly to them by virtue of what’s already known about the event in the photograph. Also, check when was photography invented.
Over a period of years, Carroll curated a collection of images about important historical themes that still influence us to this day.
That includes images of the First and Second World Wars, women’s rights, the Civil Rights movement, colonialism and indigenous peoples, popular culture, and the rise of fascism and communism, icons of the 1950s and 1960s, and Hollywood, just to name a few.
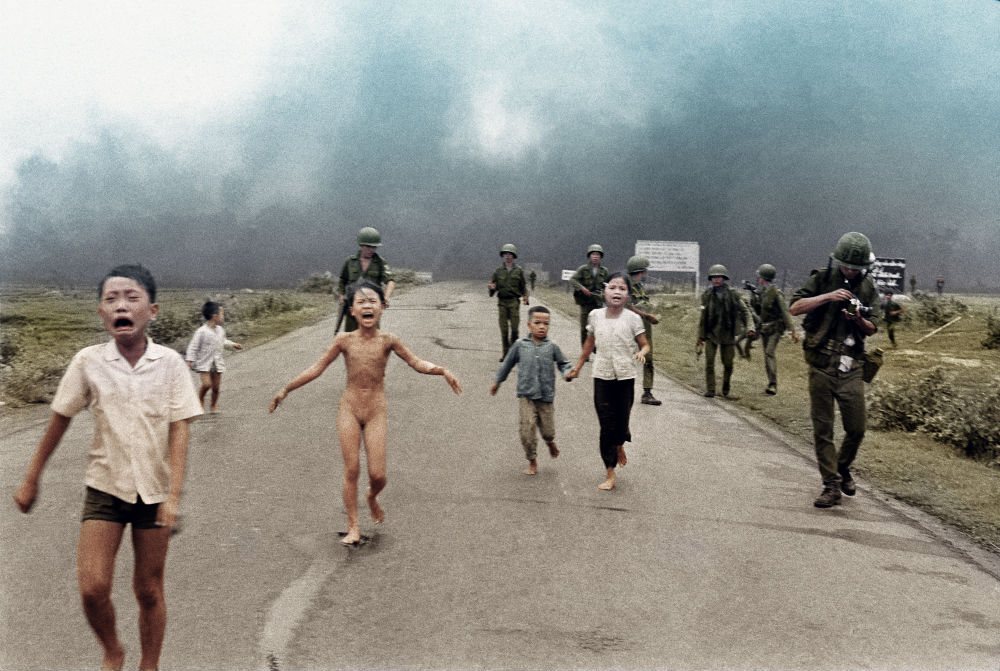 Photographed by Nick Ut outside Trang Bang Village, Vietnam, June 8th, 1972, courtesy of the Associated Press (AP). Colorized by Matt Loughrey.
Of course, it’s not just a matter of grabbing these photos off the internet.
Instead, Carroll spent about half his time putting the book together over a 12-month period simply getting permission to use the images.
Not wanting to infringe on any copyrights, Carroll and his team had to ensure that all the original images were either in the public domain or used with permission.
As Carroll notes, “Images like these are important as they make up a huge part of our psychological impression of the past, even if we are not necessarily aware of the exact circumstances under which they were taken.”
Colorizing a Photo Changes Its Dynamic
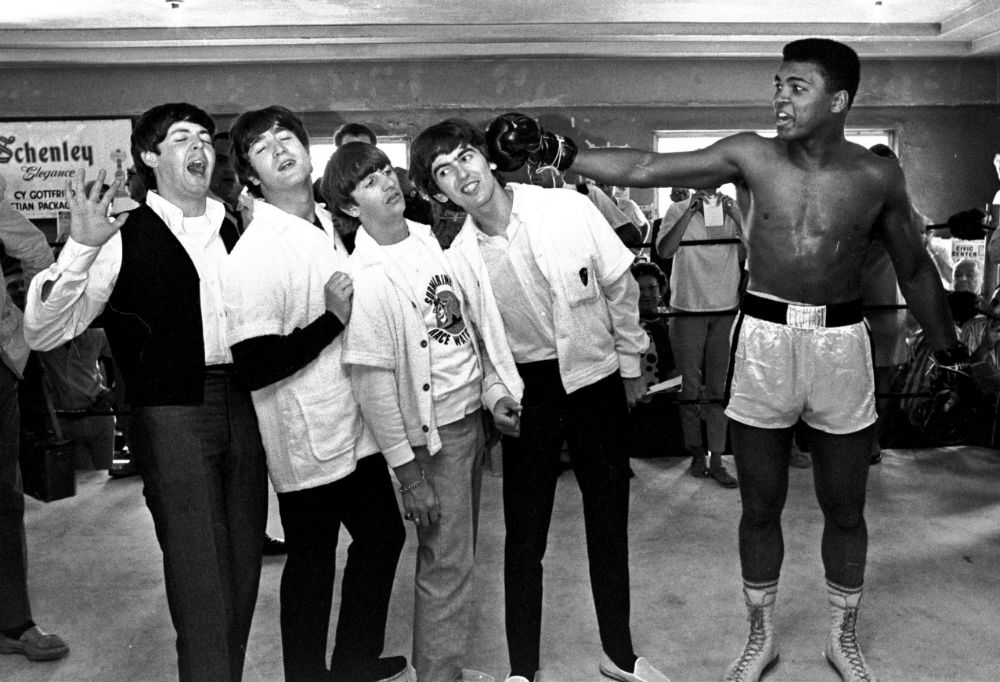 THE FAB-PAW: Two very different worlds collide – just as they are about to become global mega-stars. “The day Ali met the Beatles” from left to right Paul McCartney, John Lennon, Ringo Starr, George Harrison, Cassius Clay. Photographed on February 18th, 1964 at Miami Beach, Florida, USA, courtesy of the Associated Press (AP).
Colorizing a photo isn’t just a simple process of painting color onto them in Photoshop or Lightroom.
Instead, image colorizers have a strong connection to the original photo because they spend days on end working on getting every last detail of the image correct for the color version.
It’s a huge investment of time and requires incredible attention to detail. That connection helps colorizers create a bridge to the past with their color versions. After all, our eyes evolved to see color, so adding color to these iconic images helps people better understand what they might have seen themselves had they been there in that moment when the photo was taken. Learn more about evolution of photography on our website PhotographyTalk.com.
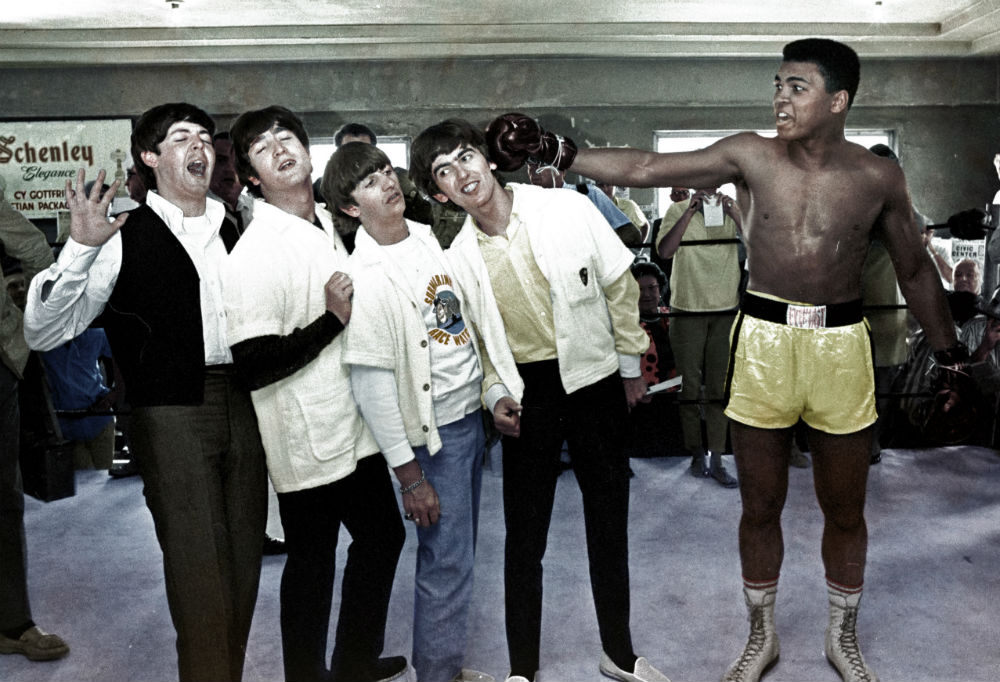 Photographed on February 18th, 1964 at Miami Beach, Florida, USA, courtesy of the Associated Press (AP). Colorized by Matt Loughrey.
And though some people say that colorizing an iconic photo removes some of its original emotional connection, Carroll has a rebuttal:
“There is a tendency for people of the present to look back at history in black and white, which can be highly aesthetic in that black and white makes the subject look pleasing to many people. However, black and white can make the viewer feel detached from the subject. We hope that adding color breathes life into historical images and reconnects people to those who went before and helps us to understand and empathize with them.”
Colorizing is a Long and Technical Process
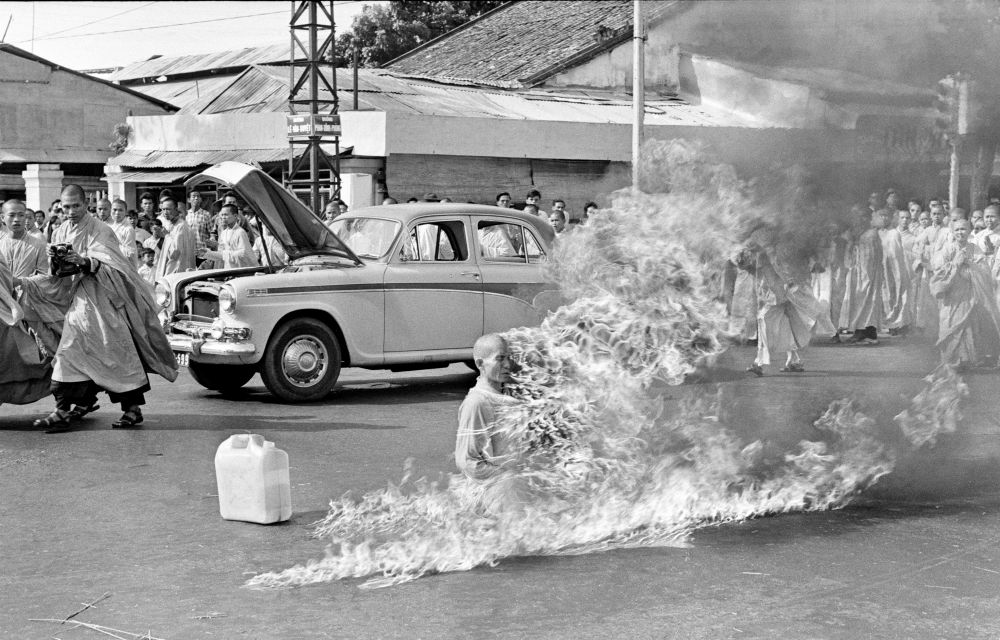 Non-violent protest is taken to its most extreme level by this monk who burned himself to death. “Vietnam Monk Protest” Thic Quang Duc. Photographed by Malcolm Browne in Saigon, Vietnam on June 11th, 1963, image courtesy of the Associated Press (AP).
The process of colorizing an image begins with selecting the desired image and then researching what colors would be authentic to an image of that time period.
Adding the colors usually occurs in Photoshop, and is carried out much like a traditional artist might paint on a canvas.
Though it sounds simple enough on the surface, consider this: colorizers must find the correct colors that match the daylight, the season, the location, and the history of the moment as well.
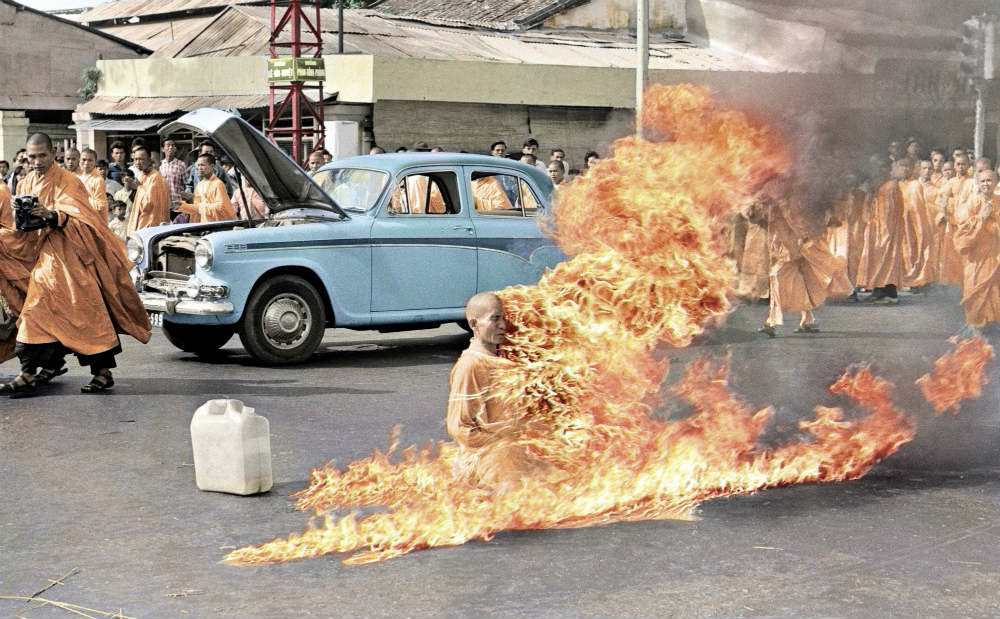 Photographed by Malcolm Browne in Saigon, Vietnam on June 11th, 1963, image courtesy of the Associated Press (AP). Colorized by Matt Loughrey.
Once in Photoshop, colorizers paint colors onto the digital black and white image.
Colors are added on different layers, typically starting with the skin of the subjects, then the foreground, and then working to the background.
The depth of field of the image is a critical consideration in the process, given that colorization can help magnify the composition of the image.
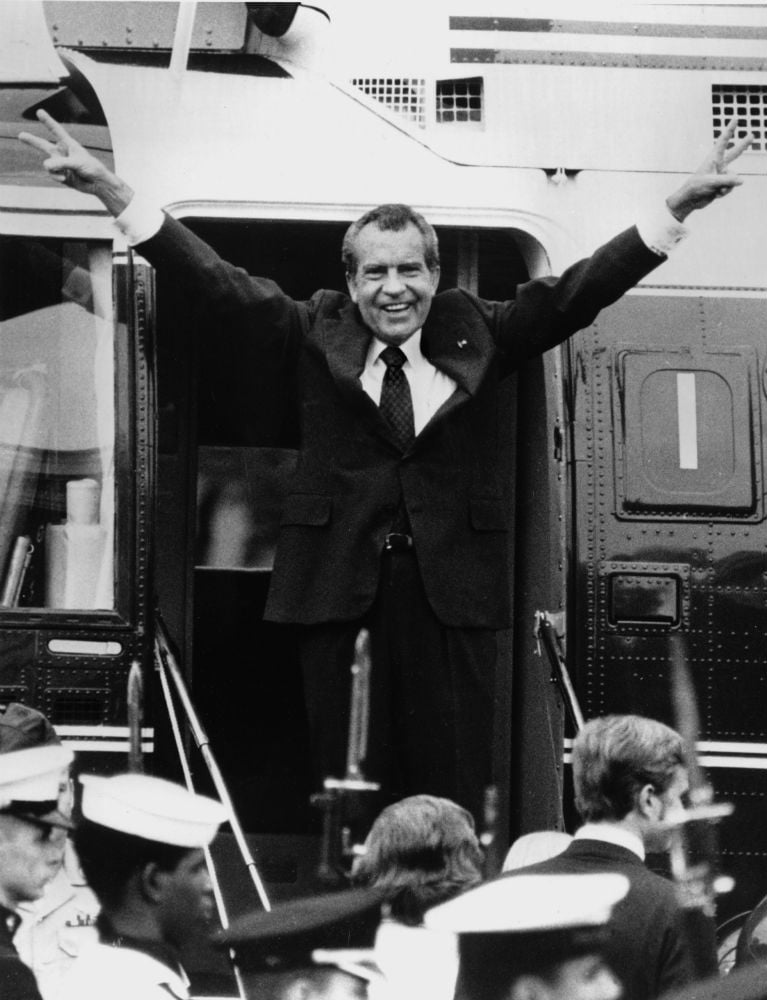 Watergate: The leader of the free world is forced to resign amid the most notorious political controversy in history. “Richard Nixon Farewell.” Photographed by Bob Daugherty outside the White House, Washington, DC, on August 9th, 1974.
In terms of the best images to work with, many colorists like glass plate images from the first part of the 20th Century because of the large size of the glass and the long exposures required to get the shot. That resulted in highly detailed images with excellent depth of field.
Interestingly, image colorists report that skin tones of people in the images they colorize have very little difference regarding the Photoshop color setting.
For example, a man with fair, white skin will have his skin painted using much the same color as a woman with dark, black skin.
The original tone of the black and white images make their skin look different in the subsequent color photo. In that regard, “skin tone” rather than “skin color” is a more accurate description of the different appearance of skin.
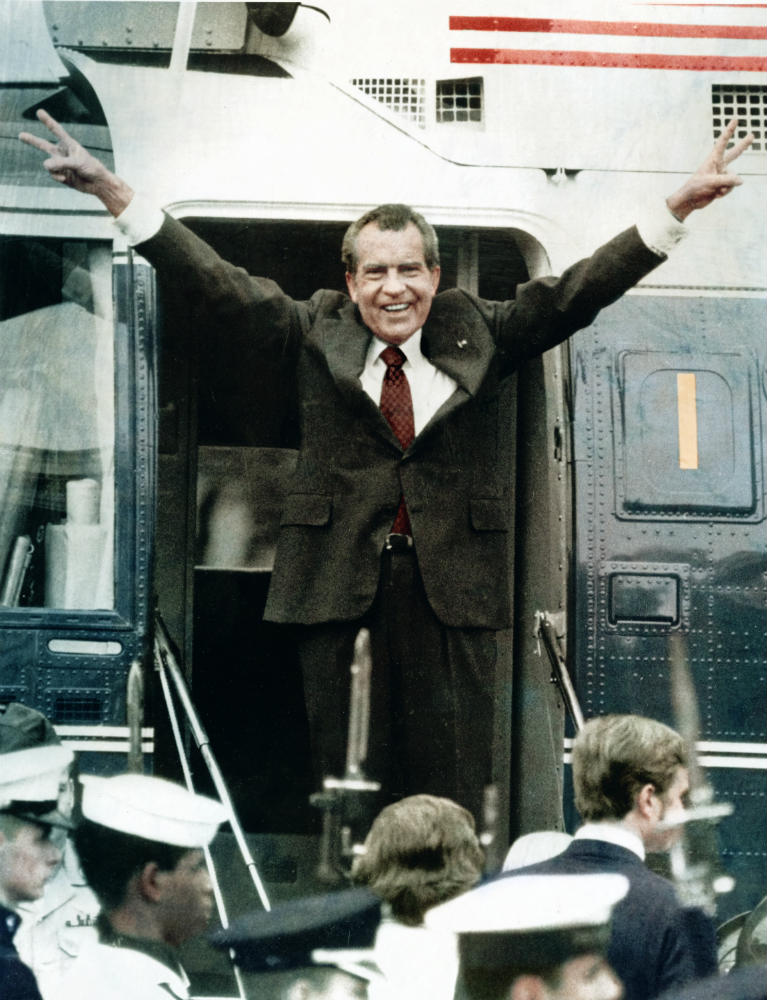 Photographed by Bob Daugherty outside the White House, Washington, DC, on August 9th, 1974. Colorized by Matt Loughrey.
When choosing colors for other features, like the eyes, it can be a straightforward or difficult process.
For example, when colorizing the photo of Rasputin, the Mad Monk of the Romanov Tsar’s Court, it’s known that his eyes were blue, so choosing the appropriate color is a no-brainer.
However, there is a need to match the colors in the light that was available in the scene in which the image was taken, so additional time would be needed to ensure they had the correct tone.
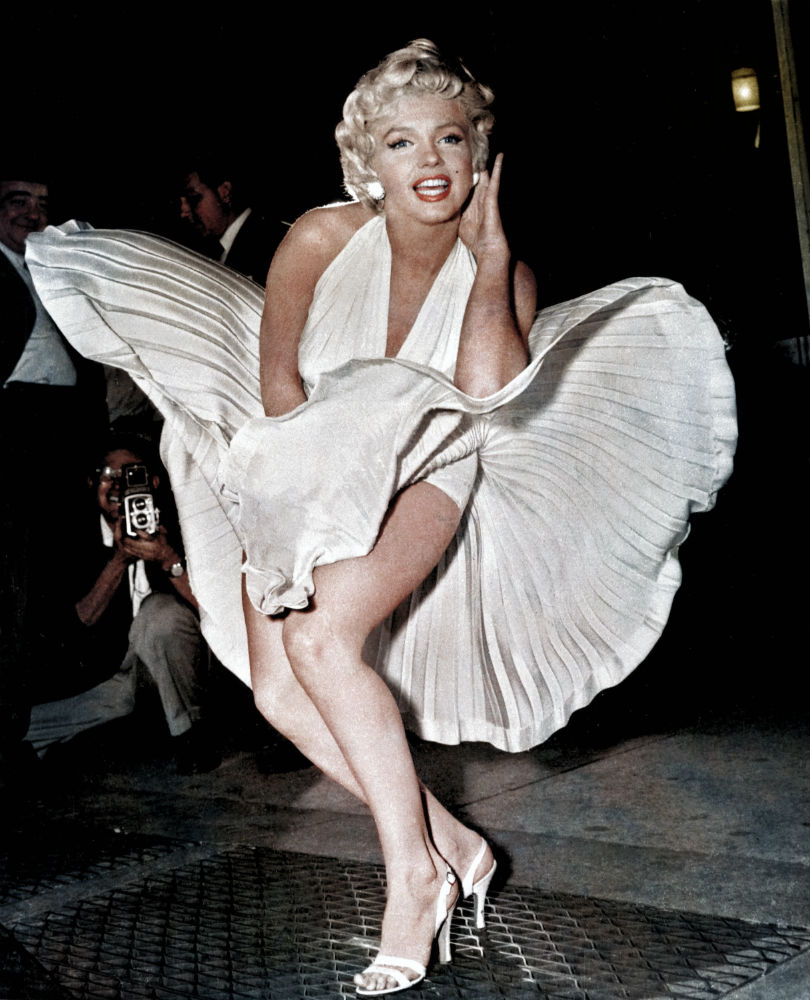
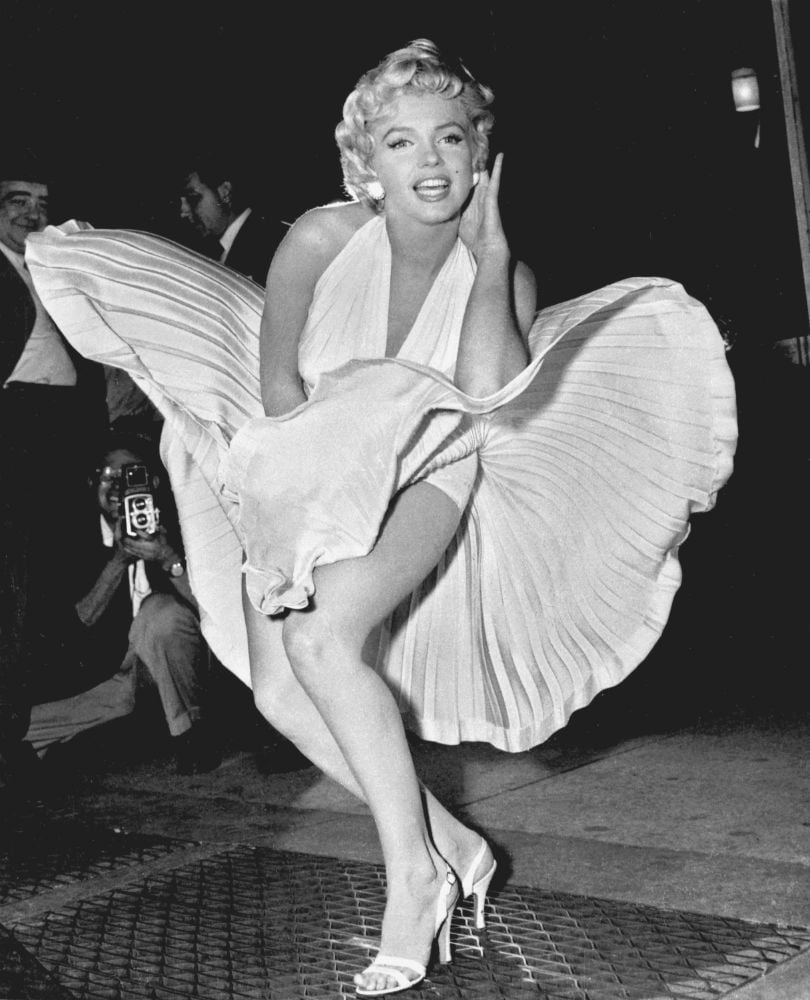 A gust of wind allows us to view Hollywood’s most celebrated actress in her most iconic pose. “Marilyn Monroe poses over the updraft of New York subway grating while in character for the filming of “The Seven Year Itch” in Manhattan on September 15, 1954.” Photographed by Matty Zimmerman.
On the other hand, if colorization is being done on an image of a World War II Sherman Tank of the British Eighth Army when it was deployed in North Africa in 1941, researchers would have to consult regimental records to identify the precise colors of the insignia on the tank because each insignia means something different.
 Photographed by Matty Zimmerman. Colorized by Matt Loughrey.
Some colorists like Tom Marshall of Photografix take an approach much like a historian, spending most of his time looking into historical documents and interviewing people that were there when the photo was taken.
Other colorists like Matt Loughrey of MyColorfulPast use a digital approach – he created an algorithm which reads the tonality of the colors in the original image and creates a color pallet that can be used as a guide. For example, if his algorithm was used to analyze a black and white photo of a sports car, it could verify which color the car would have originally been.
To say that the process of colorizing an image is an interesting one would be the understatement of the century!
Learning to Colorize Images
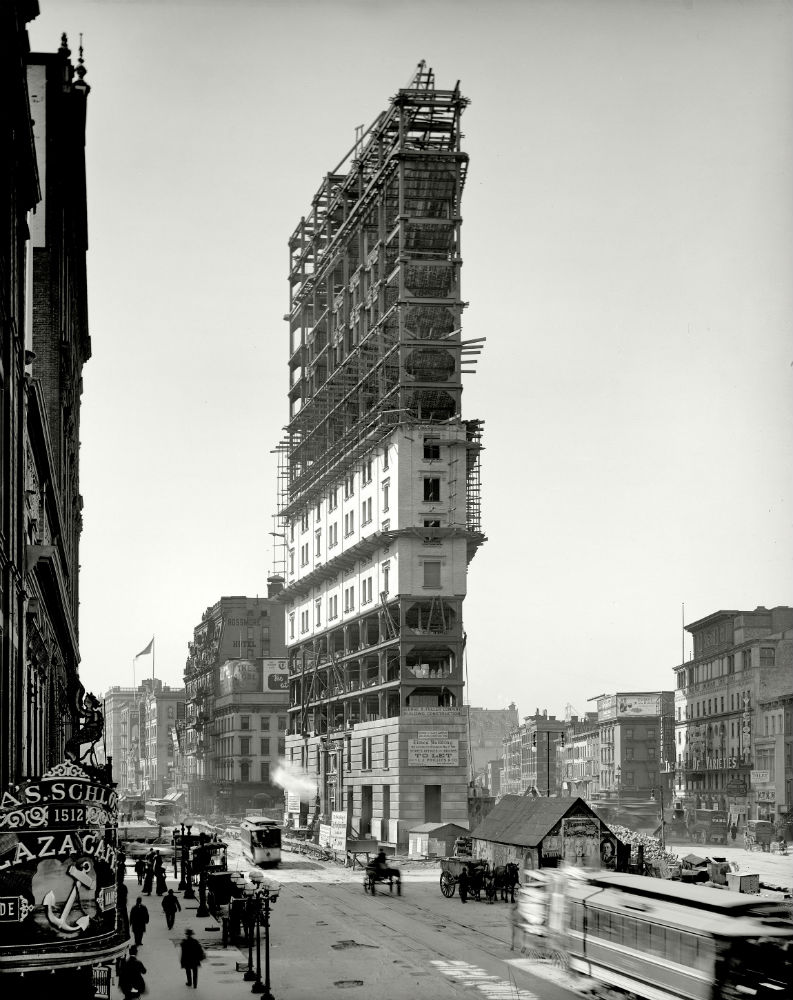 By the beginning of the Twentieth Century the crossroads of the world is born. “Number One Times Square under construction 1903.” Photographer unknown.
If seeing these amazing photo transformations and learning about the process of how they were created has whet your appetite for colorizing photos, Carroll has some sage advice.
“My advice would be jump on Facebook and like or follow a few of the excellent groups that are out there.” He continues, “Some of the best talents in this field are members or administrators of these groups and regularly contribute images and share ideas, techniques, inspire, and advise each other in a supportive environment.”
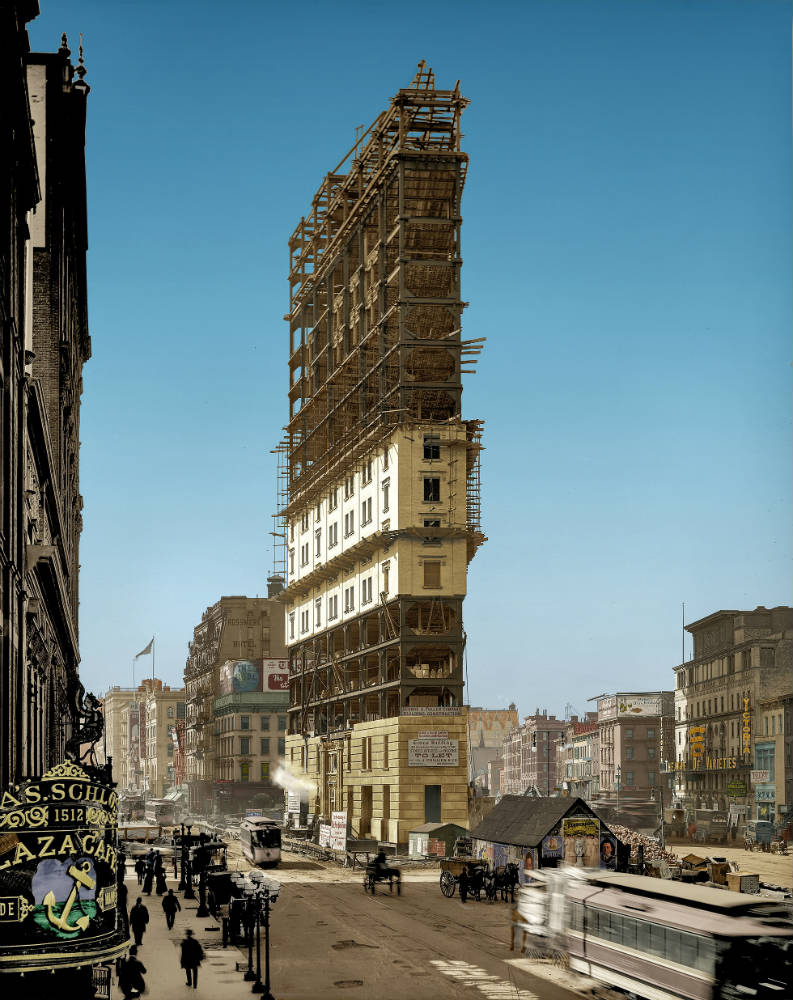 Photographer unknown. Colorized by Patty Allison.
Of course, getting a copy of Retrographic should be high on your list as well.
With a forward by the Royal Photography Society Ambassador Jeff Vickers, MBE, Hons RPS, Fenton Medal, Retrographic is littered with informative gems and a powerful narrative that bounces themes of conflict, exploration, progress, regression, culture, and hope across the age of the image.
In other words, this book is a celebration of humankind’s most impactful medium, photography.
About the Author
 Author Michael D. Carroll
Michael D. Carroll is the director of Britain’s most exciting press agency, Media Drum World. From the agency’s newsroom in Birmingham, England, he manages a team of staff journalists specializing in the curation of offbeat digital content, particularly historical photography, for national newspapers and international media outlets. He lives with his wife and two daughters.
You can learn more about Michael and Retrographic by visiting the book’s Facebook page. You can also purchase Retrographic on Amazon.
This post about the topic “Some of History’s Most Exciting Images Transformed Into Living Color” was first published on our website here https://www.photographytalk.com/photography-articles/8060-some-of-history-s-most-exciting-images-transformed-into-living-color
Source: https://photographytalkcom.blogspot.com/2021/04/some-of-historys-most-exciting-images.html


 YouTube Screenshot/Jessica Kobeissi
 YouTube Screenshot/Jessica Kobeissi
 YouTube Screenshot/Jessica Kobeissi