8 Do’s and Don’ts When Flying a Drone

Just a few years ago, we were writing about how drones were becoming the next big thing in photography.
Well, as 2020 approaches, I think we can all agree that drones are here – and here to stay.
As more and more photographers (and everyone else, for that matter…) take to the skies with a drone, safety becomes a bigger and bigger issue.
Not only do you have to fly your drone safely to avoid crashes, but you also have to be mindful of other people flying drones nearby who may or may not be as careful or as good a pilot as you are.
With this in mind, let’s explore eight things you can do to avoid crashing your drone.
Editor’s Note: Check out the first two articles in our drone series – Getting Started in Drone Photography and Selecting the Right Drone for Your Photo and Video Needs – to get even more insights about drones and drone photography.
iStock 874856672 min image

DO Fly in Open Areas

iStock 619090952 min image
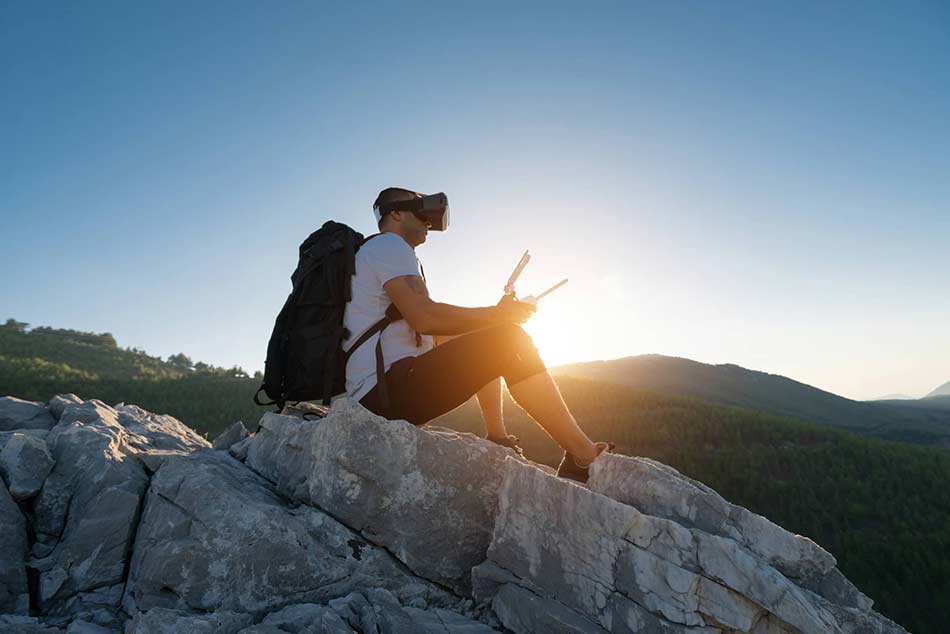
A nice, open area to fly your drone is ideal.
Not only do you avoid obstacles, but you can also maintain line of sight with your drone as you fly.
Be sure that the open area you choose isn’t restricted airspace, like near an airport, a military base or in a national park.
Needless to say, those areas are off-limits for a reason, and breaking the no-fly rule in those areas can have serious consequence.

DON’T Fly Over People or Homes

dji mavic 2 pro image  
Avoid flying over people and buildings at all costs.
A drone falling from the sky, can cause serious injury and even death, whether it be from mechanical malfunction, weather-related issues or even sabotage (you’ve seen videos of people shooting down drones, right?). Drones can also cause major damage to buildings and vehicles; an experience that even seasoned pilots encounter.
Some drones, like the DJI Mavic 2 pro shown above, come with an obstacle-avoidance system that detects obstacles. You can fly forward and backward with less worry of crashing because the Mavic 2 Pro’s APAS system will plan an appropriate flight to avoid any obstacles automatically. Though that’s excellent peace of mind, it’s still prudent to stay away from other people and their homes.
Unless you have express permission to fly over private property, avoid it altogether. If something goes wrong, it can go wrong quickly, and you could be responsible for damages. Ultimately it is best to be respectful of people’s privacy – not everyone wants a drone flying over their home!

DO Defer to Other Aircraft

defer to other aircraft image
FAA regulations require that you keep your drone at an altitude of 400 feet or less when in uncontrolled Class G airspace.
If you go above that, you run the risk of encountering other air traffic.
When flying, maintain awareness of the airspace in your vicinity. If you see or hear other aircraft, defer to them and allow them to continue on their flight path. Unless you have permission to fly in controlled airspace (like near airports), don’t even think about flying your drone!
Remember – you can much more easily see an airplane than the pilot of that aircraft can see your drone. It’s your responsibility to make sure the airspace around you is safe.

DON’T Fly When the Battery is Low

iStock 532092073 min image
Flying your drone when the battery is low is just asking for trouble.
Your drone needs battery power to stay aloft, and if you run out of juice, it could fall out of the sky, injure someone or cause property damage.
Fortunately, many drones – like the DJI Mavic 2 Pro – have intelligent batteries that trigger a “return to home” function.
This means that when the battery is at a point at which it might not have enough power to keep the drone flying much longer, it will automatically ascend to its return to home height and return if no action is taken.
If the battery is critically low, the drone will simply land itself – an action that cannot be canceled by the pilot.
Nevertheless, keep an eye out for your drone’s low battery warning so you know when it’s time to bring it home or to land immediately.

DO Avoid Poor Weather Conditions

avoid poor weather image
Though some drones come with a self-heating system for flying in the cold, avoiding adverse weather conditions is a good rule of thumb. Inclement weather to avoid includes rain, snow, sleet, hail, lightning, and certainly strong winds.
Each of these weather events makes flying much more difficult, and negatively impacts the performance of the drone too.
Just like you have to take extra caution when driving your car in bad weather, the same caution should be exercised when deciding if it’s okay to fly your drone.

DON’T Fly Under the Influence

iStock 694733082 min image
Flying a drone under the influence of alcohol or drugs is a recipe for disaster. Under no circumstances should you attempt to fly when in an altered mental state.  
Your ability to maintain line of sight with your drone – let alone pilot effectively – will be significantly reduced if you fly while impaired.
Be smart: only fly when you are physically and mentally capable of doing so in a safe manner.

DO Ensure the Compass is Calibrated and the GPS Signal is Strong

Before you take flight, make sure its compass is properly calibrated.
While in flight, avoid strong magnetic fields that emanate from certain structures, like steel-reinforced buildings. 
Likewise, if you aren’t picking up a strong GPS signal, don’t take flight.
DJI recommends flying with a signal from at least 10 GPS satellites and at least four bars of GPS signal for optimum safety.
To see how to calibrate the compass on the DJI Mavic 2 Pro, check out the video above by Dylan Young.

DON’T Answer Your Phone While Flying

iStock 639706344 min image
Talking or texting on the phone are illegal driving a car, and for good reason.
These activities distract you from the task at hand and increase the likelihood of an accident.
For the same reasons, you should never answer your phone while flying a drone.
Remember, flying a drone isn’t just a fun activity – it’s a huge responsibility that requires you to be alert, attentive, and respectful of others around you.

This article about “8 Do’s and Don’ts When Flying a Drone” was first published on our website here https://www.photographytalk.com/beginner-photography-tips/8-dos-and-donts-when-flying-a-drone

Source: https://photographytalkcom.blogspot.com/2020/08/8-dos-and-donts-when-flying-drone.html

Getting Started in Drone Photography

There’s no mistaking that drones have become one of the hottest ways to take photos.
The opportunities that drones give you to take unique photos from interesting perspectives are undeniable.
But getting started with drone photography can be a little intimidating.
That’s due in part to the complexities of actually flying a drone. Getting the best drone for photography can also be quite spendy, too.
drone photography tips image
But with these drone photography tips, you can overcome your fears and trepidations about drone photography and learn how to take your photos to new heights – literally!
Get started by checking out my video on this topic, and then get step-by-step tips in the article that follows.
Editor’s Note: This article is the first in an upcoming series on drone photography. Below, I’ve outlined some basic pointers for getting started. Each of these topics will be discussed in more depth in coming articles and YouTube videos, so stay tuned!

Table of Contents

Rent Before You Buy

pleased man looking for his new drone run picture id626385960 image
Photo by golubovy via iStock
Investing in a drone is a serious undertaking, and one that should not be done lightly.
The best drones aren’t exactly cheap when you buy new.
That’s why I’m an advocate of renting several drones before you buy.
The advantage of renting is that you can get a feel for how each drone performs.
Not all drones are alike, and each has its own “personality,” if you will, that makes it a unique flying and photographing experience.
Besides, what I think is the best drone might not work at all for your specific workflow, so getting some experience with several drones allows you to determine which one best fits your needs.
Quick Tip: Practice flying the rented drone in an open area far away from potential obstacles. An open field works best. Avoid populated areas and flying over roads, homes, and so forth. Practice the essentials first – like taking off and landing – and then practice lateral movements, moving in an arc or circle, and flying the drone when it is facing toward you (which reverses the controls).

Develop a Pre-Flight Checklist

drone photography tips develop a pre flight checklist image
Photo by sv3207 via iStock 
In the excitement of having a drone in your hands, it’s hard to resist heading outside and immediately trying to fly it.
However, it’s prudent to develop a pre-flight checklist, that way you’re sure you’re flying safely to protect people, property, your drone, and yourself.
Common tasks on drone pre-flight checklists include:
  • Checking the weather forecast, including the predicted wind speed
  • Inspecting the drone for any damage or faults (i.e., damaged rotors) that might impact its ability to fly
  • Ensuring the drone’s batteries are fully charged
  • Ensuring drones are legal in the location you wish to fly
  • Having the proper registration with the FAA
  • Checking for potential obstacles
  • Hovering the drone for a few seconds before flight to ensure proper drone behavior
This is just a basic pre-flight checklist, but you get the point – before you fly, there are plenty of tasks to complete to ensure the safest flight.

Identify the Most Important Features in a Drone for Your Purposes

drone features 1 image
Photo by Onfokus via iStock
I live in Southern California, so the wind here can be a real issue. As a result, I invested in a drone that can handle high winds.
But for your purposes, the most important factor might be something else – weatherproofing, for example.
Depending on where you live or where you intend to fly your drone, the “secondary” features the drone has might be different from the next guy.
The primary features, though, are going to be similar regardless of who you are or what you need to do with the drone.
For example, you want to examine the size of the sensor in the drone’s camera. The larger the sensor, the more detailed and resolute images you will get. Larger sensors also provide you with better low-light performance.
More often than not, a one-inch sensor is going to be the biggest you can find in a drone. This size of sensor can help you capture improved images and videos because of its ability to capture more light.
drone features 2 image
Photo by ViktorCap via iStock
Another feature to consider is the video quality the drone is capable of capturing.
Most modern drones have 4K video, which is exactly what you want. But, some less expensive drones still max out at 1080p, so just be sure you investigate the video capabilities of drones before you commit to buy.
While 1080p is fine for sharing videos on social media, if your aim is to create cinematic videos, you’ll want 4K and a variety of frame rates to choose from.
Traditional video footage is shot at anywhere from 24fps to 30fps, but if you want slow-motion options, you’ll want a drone that can handle 60fps or higher.
Aside from the camera hardware, also examine a drone’s flying abilities.
For example, can it hover without moving? Some drones do this to perfection, which enables you to capture super-smooth video and beautifully sharp still photos.
But if the drone can’t hover, it will rise and fall in altitude which will impact the quality of the photos and videos you take.
mavic mini gimbal image
Quick Tip: Invest in a drone that has a gimbal, like the DJI Mavic Mini shown above. A gimbal will help stabilize the camera so you can get smooth video and sharp photos. In the case of the Mavic Mini, it has a motorized three-axis gimbal that will help you get higher-quality images and videos.
drone features 3 image
Photo by SimonSkafar via iStock
Likewise, does the drone have an obstacle avoidance system?
These systems use sensors on the front, back, sides, and bottom of drones to help you avoid colliding with objects as you fly.
For example, the DJI Mavic 2 Pro’s avoidance system enables it to recognize obstacles and plan a flight around those obstacles automatically.
Needless to say, these systems are invaluable for new drone pilots as they help reduce the chance of crashes, but they are also a huge asset to experienced drone pilots that perform intricate flight patterns near potential hazards.
See the Mavic 2 Pro’s obstacle avoidance system be put to the test in the video below by The Everyday Dad:
Lastly, when choosing a drone, be sure you familiarize yourself with its intelligent features.
While some drones offer just a smattering of tracking or video modes, others are packed full of features like automatic subject tracking, the ability to take selfies by moving your hand, flying along waypoints you determine ahead of time, and so forth.
Granted, the more features a drone has, the more expensive it will be. But these features can definitely be worth the price tag when you see the beautiful results you can get.

Don’t Forget Essential Photography Rules

drone photography composition tips image
Photo by Kirk Wester via iStock 
As you’re flying your drone around in search of the perfect shot, remember the essential photography rules you’d use to get the best shots if you were using a traditional camera:
  • The rule of thirds will help you create a balanced shot.
  • Leading lines help draw people into the shot and connect the foreground to the background.
  • Varying the perspective from which you shoot allows you to highlight different aspects of the landscape below the drone.
  • Shoot during golden hour to capitalize on the soft, warm light of sunrise or sunset.
  • Have a strong subject that captures the viewer’s attention.
Adhering to these tried-and-true techniques will help you take photos that have lots of impact.
Quick Tip: Look for patterns, textures, and shapes in the landscape to highlight in your photos. Our eyes are naturally drawn to these types of features, and making them a prominent aspect of your drone photos will make your shots much more compelling.

Final Thoughts – Getting Started in Drone Photography

getting started in drone photography image
Photo by Onfokus via iStock
As I mentioned in the introduction, this is just a quick overview of some of the topics that are important for getting started in drone photography.
Like any other type of photography, it will require a good deal of time, patience, and practice to become a master drone photographer.
It is my hope that the forthcoming articles and videos in this series will help you understand the ins and outs of being a drone pilot so you can capture the highest quality photos and videos – and do so safely.
I look forward to helping you along in your pursuit of gorgeous aerial photos and videos!
This article about “Getting Started in Drone Photography” was first published on our website here https://www.photographytalk.com/getting-started-in-drone-photography

Source: https://photographytalkcom.blogspot.com/2020/08/getting-started-in-drone-photography_24.html

Getting Started in Drone Photography: Selecting the Right Drone

As drones have become more and more popular for regular folks like you and me, the market has been flooded with drones of all sizes, capabilities, and prices.
The first step into drone photography is to select the drone that best fits your needs.
There are various ways to do that:
Do you need something small and budget-friendly that can take off from the palm of your hand? 
iStock 530576658 min image
Do you want a top-of-the-line drone system that you can fly fast and far while taking breathtaking 4K video and still images? Maybe something in between?
For our purposes, we’ll focus on drones manufactured by DJI. Not only does DJI have a reputation for putting out some of the best drones on the market, but they also cover a wide spectrum of drones in terms of pricing and features. DJI has also invested the most in developing technologies that make their drones durable, easy-to-use, and safe, too.

DJI Spark

spark3 image
The DJI Spark might be a mini drone, but it’s packed with all the features you’d expect from a top end drone.
For starters, it’s equipped with a 12-megapixel camera that’s paired with a f/2.6 25mm lens and a mechanical 2-axis gimbal. The resulting photos you take with Spark are clear, crisp, and rich in detail. Plus the Spark comes with UltraSmooth technology that reduces camera shake to help any beginner take great photos from the air.
Even better, UltraSmooth technology minimizes rolling shutter effects, so your videos look better too!
dua image
The DJI Spark has other intelligent features that assist you in having a productive, safe flying experience.
Next level FaceAware technology allows the Spark to identify you and respond to gesture controls, following your movements as you travel forwards, backwards, left, and right. Simply wave your hand up or down and the Spark will follow. 
Flying the Spark without gesture controls is equally as easy. Using TapFly, simply tap on your phone screen to tell the Spark where to go. And while on its way, it will automatically avoid obstacles and maintain a constant altitude. Learn more about TapFly and other awesome features in the video below:
Quick video functions are also available through the Spark’s QuickShot technology. Choose from four common cinematic shots to shoot professional-level footage. Add in ActiveTrack, which recognizes objects of differing sizes and shapes, and you can track subjects as they move around.
Editor’s Tip: For even more flexibility with Spark, you can upgrade to the Spark Fly More Combo which includes a remote controller, two intelligent batteries, eight sets of props and prop guards, and more. Get all the details about the Fly More Combo by visiting Drone World.
Inteligent FlightModes 1 image
You don’t even need a controller to fly the Spark…
DJI’s PalmControl system means you can direct its movements with hand gestures.
Just raise your arms and wave your hand to direct the aircraft where to go and to take photos. You can also make a frame with your fingers to trigger the shutter, as shown above.
And as if that’s not cool enough, the DJI Spark can take off from your hand!
With a flight time of 16 minutes and a top speed of 31 mph, Spark is an ideal drone for pilots of any expertise level. And with pricing starting at under $500, it’s affordable, too!

Learn More:

DJI Mavic Pro

mavicpro remote image
If your drone photography requires something a bit more powerful, I suggest checking out DJI’s Mavic Pro.
But even though the Mavic Pro is a more powerful drone, it’s still incredibly small. In fact, it folds down to as small as a bottle of water, making it a highly portable choice for your drone photography.
The Mavic Pro has a flight time up to 27 minutes, so you can take all sorts of photos and videos before the drone needs to be recharged. It flies up to 40 mph, so you can get from point A to point B in no time!
And don’t worry about losing contact with your Mavic Pro – the OcuSync transmission system gives you a whopping 4.3-miles of range. 
Like Spark, the Mavic Pro has all the bells and whistles, including TapFly and ActiveTrack for getting in position and tracking your subjects with ease.
Add to that an Obstacle Avoidance System with sensor redundancies, and you have a drone that’s not only safe to fly, but reliable as well.
You can even fly the drone by phone or over Wi-Fi, making it that much simpler to operate.
mavicpro smallsize 1 image
As for the camera, well, it’s pretty awesome, too!
You get a 4K camera stabilized by a 3-axis mechanical gimbal for sharp still photos and smooth video.
With DJI’s FlightAutonomy system, you can fly with confidence because the Mavic Pro will avoid obstacles in its path. It also allows you to takeoff and land from the exact same spot, as well as hover and fly at the same elevation, even in varied terrain.
In other words, this thing is packed with awesome features that make flying fun, safe, and productive with high-quality photos and videos.
Editor’s Note: DJI’s Mavic Pro MaXX Mod Long Range Kit takes this drone to a whole other level. You get MaXX mod long range remote control antennas, a custom hot-swap antenna bracket, carbon fiber propellers, two extra batteries, L-Series lens filters, a 64GB MicroSD card, an award-winning backpack with Rapid Deploy Technology, and so much more. Learn more about this kit in the video above. For the ultimate experience with the Mavic Pro, check out all the specs of the MaXX Mod Long Range Kit.

Learn More:

DJI Phantom 4 Pro

phantom 4drone image
Yet another step up in DJI’s line of drones is the Phantom 4 Pro.
Let’s start with this bad boy’s camera.
It has a one-inch 20-megapixel Exmor R CMOS sensor paired with a 24mm f/2.8-f/11 lens.
The camera has an ISO range of 100-3200 for still photos, expandable to 12800 in manual mode.
Add to that mechanical and electronic shutters that range up to 1/2000 seconds and 1/8000 seconds respectively, and you’ve got the makings for a camera that performs well in low light situations and can capture fast-moving subjects without motion blur.
It even takes 4K video at 60fps and can shoot still photos in burst mode at up to 14fps. That’s not bad at all!
phantom4remote image
When it comes to the drone, well, DJI has tricked this thing out.
It’s got a 30 minute maximum flying time, a 4.3-mile range and a remote controller with a built-in screen for easier piloting.
Like DJI’s other drones, the Phantom 4 Pro can avoid obstacles automatically for a safer flying experience.
Naturally, it has TapFly, ActiveTrack, and Smart Return Home as well, which means the drone can avoid obstacles when it’s time to come back to you.
Editor’s Tip: The DJI Phantom is perhaps the most customizable drone out there. Drone World offers numerous bundle kits for both the DJI Phantom 4 Pro and the Phantom 4 Pro+. See all the different kits that are currently available by visiting their website.
phantom4camera image
Perhaps even more exciting is the new Draw feature.
Draw lets you draw a route on the controller screen, and the drone will move in that direction while keeping a constant altitude.
That means that you can turn your attention to things like controlling the camera to get the ultimate shot rather than trying to do so while also watching where the drone is going.
I also like the DJI GO app.
By using your smart device for monitoring real-time video feeds, flight statistics, and advanced settings, the remote can be used for physical controls like piloting the drone.
That makes for a much simpler setup for optimizing your aerial shoots. The DJI GO app also gives you full manual camera controls, so you can control shutter speed, aperture, and ISO, just like a traditional camera. You can even edit photos in the app, post them to social media, or live stream your footage!
See the DJI Phantom 4 in action in the video above.

Learn More:

DJI Inspire 2

inspire2 x4s image
If it’s the Ferrari of drones you’re after, then look no further
This commercial drone is packed to the gills with incredible features that make it one of the best drones money can buy.
You can order the drone as part of a bundle that includes the Inspire 2 Drone, an X4S Camera Lens, two intelligent flight batteries, a remote controller, a carrying case, and tons of other goodies as well.
Add to that a range of 4.3 miles, two batteries, and a self-heating system for those occasions when you want to fly in colder weather, and you have the makings for one heck of a drone!
inspire2avoidance image
This thing performs like no other, too.
It goes from 0-50 mph in four seconds and can fly up to 67 mph. 
With the dual battery system, the Inspire 2 can stay airborne up to 27 minutes, and with an upgraded version of FlightAutonomy, you get two directions of obstacle avoidance to help prevent any collisions or mishaps when flying.
The magnesium aluminum composite shell with carbon fiber arms help lighten the drone (and they look really cool too!).
inspire2camera image
Perhaps my favorite feature of the Inspire 2 drone is the Spotlight Pro feature.
Using advanced visual tracking algorithms, the drone can lock onto a subject in flight. When enabled, no matter which direction you fly the drone the camera  will remain locked onto the subject for sweeping, dramatic views.
On other drones, this wouldn’t be possible with just one operator, requiring a second person to control the camera while the pilot flies.
Better still, if the onboard gimbal reaches its limits, the Inspire 2 will rotate in the same direction, allowing you to create smooth tracking shots without disturbing flight control.
There are simply too many features to list on the Inspire 2 – it’s just that good!
Check out the video above to learn more about the Inspire 2’s features.
Editor’s Tip: Want even more features with a DJI Inspire 2? Check out the Inspire 2 X5S Premium Pack. It comes with a wheeled SKB hard case, four batteries and hub, lens filters, a 64GB memory card, a sunshade, and more. Get all the details by clicking here.

Learn More:

Wrapping It Up

inspirepilots image
As you can see, there’s a wide variability in the drone market in terms of features, size, and price point.
Before you dive into drone photography, it’s important to do your due diligence and select a drone that will work for your specific situation.
Use the information I’ve outlined above, check out the videos, and read up on the Learn More links throughout the article to determine which DJI drone is right for you.
Stay tuned for more drone-based articles that will help get you in the air to capture your very own dramatic drone photos and videos.
This blog post about “Getting Started in Drone Photography: Selecting the Right Drone” was first published on our website here https://www.photographytalk.com/beginner-photography-tips/getting-started-in-drone-photography-selecting-the-right-drone

Source: https://photographytalkcom.blogspot.com/2020/08/getting-started-in-drone-photography.html

Advanced Drone Flying School

I love digital photography and videography with a drone. Although I was already an advanced and experienced filmmaker and photographer, I had to go to my own personal drone pilot school before I felt expert enough as a drone operator and pilot.
Advanced Drone Flying School image
Thankfully, the learning curve is not steep, and anyone who is already used to learning new technology for digital photography can step up from beginner level with just a little instruction and practice. 
So, if you upgraded from posting JPEGs to using Lightroom plugins, or upgraded from the built-in flash to an advanced speedlight, you can do this. Here are some useful drone flying tips to help you get past the beginner stages. 

Practice Flying

DJI drones 1 image
Arthur Dent (Hitchhiker’s Guide to the Galaxy) learned how to fly accidentally. We, however, will need to make a conscious effort to become a good drone pilot. The newest drones, such as the DJI Mavic 2 Pro, make this step easier than earlier generations of drones.
DJI Mavic 2 Pro has an amazingly high quality Hasselblad camera and advanced flying controls. To get the most benefit from those features and high quality, taking some time to practice is as important as becoming familiar with your other high quality photographic gear.
Many drone makers have helpful drone flying tips on their own websites. I still haven’t finished all that DJI has on theirs.

Recommended Drone Photography Reading:

Storyboard Your Drone Videos 

drone flying school 2 image  
Storyboard template by Happy_vector
An essential advanced video tip doubles as one of our advanced drone tips. Storyboards are used by videographers to plan out shots for an efficient workflow and to tell a good story. 
Here’s how it works. You come up with an outline of the video footage you want. It could be all drone footage or you could be using your drone to add B-Roll to another video. Using that outline, I like to actually draw out a series of shots. 
This helps get your ideas from your mind to the screen. You can simply fly and film by the seat of your pants, but planning will result in less wasted footage during editing.

Take It Slow

drone flying school 1 image
Photo by Ahe from Pexels 
By taking it slow, I’m not simply speaking metaphorically. I mean this literally. Though advanced drones such as the DJI Mavic 2 Pro can fly at speeds approaching 50 MPH, there are very few times during filming that we will need to use that capability. 
An advanced drone tip I learned is to quickly fly to where you will begin shooting, but then slow down for the taping itself. While the motion effect filming can be used judiciously, indiscriminate motion shots can detract from the video.
Unless you’re aiming for a specific, that is. It’s just like videography with your mirrorless or DSLR. If you zoom in and out quickly, or pan rapidly across the field of view, that looks jarring and is often uncomfortable to view.

Use Flight Modes

drone flying school 5 image
photo by urbazon via iStock 
The DJI Mavic 2 Pro and other DJI drones have a set of features labeled Intelligent Flight Modes. Similar functions are also found in the various drone brands in the field. Learning these flight modes will allow you to concentrate on the camera work, while letting the drone fly itself.
Once I figured out this advanced drone flying tip, it helped smooth my filming a great deal. Picture it as having an assistant as a dolly mover or a focus puller on a ground based cinemagraphic set.
Some of the flight modes will automatically do for you what you already put on your storyboard. DJI Mavic 2 Pro has some great modes that will enhance your videos.
drone flying tips 3 image
photo by SimonSkafar via iStock 
Dronie mode is a basic mode that slowly flies the drone upward and backing away from the subject. You can reverse it in flight or editing to also be an approach shot.
Circle and Helix modes circle or spiral around your subject, keeping the subject centered in the field of view. By the way, one of my own advanced drone tips is that you can be relatively close to ground level for these drone flying tips, it doesn’t always have to be an obviously overhead view.
Boomerang mode is super useful. In this mode, the DJI Mavic 2 Pro flies around your subject in an oval pattern, slowly rising and backing away, then it smoothly reverses to descend and approach the subject. See Boomerang mode and other intelligent flight modes in action in the video below by Drone Supremacy
Perhaps the Intelligent Mode I appreciate the most is the Dolly Zoom mode. In videography and cinematography, dolly zoom is used to change the apparent perspective while keeping the subject the same size in the field of view.
The dolly zoom effect changes the background appearance significantly, though the subject remains the same. You zoom in or out while changing camera position from closer to further away or vice versa. 
A difficult trick when filming on the ground, I’m extremely grateful for having this intelligent mode available to me in the air. Again, don’t get stuck in the thought that all drone shots need to be from way overhead. Set this up near ground level for amazing footage to add to your video project.

Use That Gimbal

DJI drones 2 image  
The 3-Axis gimbal is another extremely useful tool for drone videography. Practice ahead of time to move beyond the intelligent modes. Adjusting the camera position while flying adds interest to your shots while allowing you to increase your average shot time and scene time.
Using your storyboard as a guide, you will decide that some shots are going to look great from directly overhead. It’s a drone, it flies, might as well use that feature to good affect when it fits your creative vision.

Use Photographic and Cinematographic Techniques

advanced drone tips 4 image
 photo by kurmyshov via iStock 
In the beginning stages, we were thrilled to have our drone because it let us fly. That thrill never really goes away, but we do learn to view our drones as a real camera after a while. Drones are one of the most useful cameras for videography yet invented.
All of the advanced techniques and methods you learned for creating outstanding still images and video footage also apply to your drone use. Use your drone as a real camera, you will be amazed by what you can accomplish.

This blog post about “Advanced Drone Flying School” was first published on our website here https://www.photographytalk.com/advanced-drone-flying-school

Source: https://photographytalkcom.blogspot.com/2020/08/advanced-drone-flying-school.html

Basic Drone Flying School

You’ve unpacked your new drone and now you’re chomping at the bit to get it up in the air, to get your drone flying. Assemble the blades, charge the battery, install the app, you’re ready to go… But wait! There’s more! 
For first-time users to learn how to fly a drone, attending a drone flying school may be a good idea. You can get the education you need either by video courses or by taking in as many drone photography tips from experienced users as you can find that are relevant to you and your drone. 
Basic Drone Flying School image

First Step – RTM!

drone flying 1 image
 photo by knape via iStock
Things are different than when many of us first started in photography or videography. One of the biggest advances I’ve seen in recent times is the advent of flying drones used by everyday people for photography and videography.  
If you want to use basic cameras in automatic modes, you may be able to simply turn it on and start taking pics. With a more complicated tool, or one with advanced features, it isn’t necessarily that simple. 
RTM is a term used online to give a very good piece of advice to new drone users before you try to get that drone flying. It means Read The Manual. Even though we could simply turn it on and learn by trial and error, gathering basic knowledge ahead of your first use will result in immediate benefits.

Recommended Drone Photography Books:

Satisfy the Legal Requirements 

drone flying school 2 image
 photo by sefa ozel via iStock 
It doesn’t matter if you are just practicing, there are laws and regulations controlling drone flying in the United States and in many countries worldwide. It’s easy to find the requirements and satisfy them, many things can be done online.  
Do not neglect this step, it is for your protection as well as others. Drone flying is regulated differently depending on the drone’s weight and also according to their intended usage.
Check the learn more links below for more details about the legalities of flying a drone in the U.S. 

Do a Dry Run

how to fly a drone 3 image
You may not even need to turn on the drone in order to get some practice flying and using your drone. Many drone manufacturers have smartphone and tablet apps that work like a flight simulator.  
For instance, DJI drone operation can be learned by using their DJI GO app in flight simulator mode. This lets you get very familiar with the features and operations of your new drone.
Why is this an important step? It’s important because you really need to practice with the capabilities and features of your particular drone. This is true for your drone regardless of whether you’ve used another drone before because of the differences among drones and the drone flying characteristics.
how to fly a drone 4 image
As an example, if you were used to flying a small, relatively simple drone such as the DJI Mavic Mini (shown above), and have upgraded to a more capable imaging machine like the DJI Mavic 2 Zoom (shown below), you have more features and different capabilities to learn.
how to fly a drone 5 image
For instance, the DJI Mavic Mini is an ultra light drone, under the 250 gram threshold. It has a top speed of about 30 mph and a very capable camera with a 12MP still camera and 2.7K video recording. So, it’s very full featured and capable of capturing fantastic stills and video. 
If you are now stepping up to the DJI Mavic 2 Zoom, you now have a larger format camera with a zoom lens, which is another control to take care of, by the way. The Mavic 2 Zoom is over 250 grams which requires different registration than the Mini for non-commercial use. It also has a top speed of 45 mph, quite a bit faster than the Mini’s 30 mph. 
So, familiarity with the camera and flying controls is a vital early step in getting your new drone into the air.

Follow a Pre-Flight Drone Checklist

pre flight drone checklist 6 image
 photo by golubovy via iStock 
Okay, you’ve finished all your registration and you are familiar with the features and capabilities of your new drone, now let’s go outside and fly! 
As a drone operator, you are more than merely a photographer, you are also a pilot. All pilots do a pre-flight check, and so should you. What is included in a drone flying pre-flight checklist?
Charge up your batteries. Flight times are advertised as being long, and compared to early drones they are long. Still, 30 minutes will go by before you know it when having fun while drone flying.
pre flight drone checklist 7 image
 photo by martin-dm via iStock 
Check the weather. Every place in the entire USA that I’ve ever been has a quaint ‘local’ saying: “If you don’t like the weather, with 15 minutes!” In other words, weather changs, sometimes rather quickly. Just because it is sunny and calm now, that’s no guarantee it that wind may pick up and thunderstorms form. I use a weather alert app on my smartphone. Each locality has TV stations with free alerts, national services exist, too. 
Set your altitude and range limits, as well as your return to home settings. We sure don’t want to lose our drone on our first day of drone flying school.
Double check your propellers are mounted properly and make sure you have a strong GPS signal. 

First Flight Safe Practices

drone photography tips 8 image
 Photo by YURI MANEI from Pexels
Now that you are ready to fly, let’s get the drone flying. As you lift up the drone above you, pause for a little while and hover. This lets you check the drone’s stability.  
As you’re hovering, go through some camera and lens functions.
Snap a couple of pictures and shoot a few seconds of video. Make some adjustments to the drone’s orientation. Fly around a bit right around your home base, get used to how quickly the drone reacts to your flight controller. 
Get a few tips on flight modes for DJI drones in the video above by Adorama.

Now It’s Time To Fly

drone photography tips 9 image
Photo by The Lazy Artist Gallery from Pexels 
“I believe it’s time for me to fly!” from REO Speedwagon is the theme song for drone flying. Well, actually it isn’t, but it should be.  
Taking a little time to familiarize yourself with your drone by reading the manual, playing with flight simulator, doing a pre-flight check, and hovering when first taking off will pay off in a safe, productive, and fun drone flying session.
 This article about “Basic Drone Flying School” was first published on our website here https://www.photographytalk.com/basic-drone-flying-school

Source: https://photographytalkcom.blogspot.com/2020/08/basic-drone-flying-school.html

Advanced Drone Photography Tips: Planning and Strategy

The best results often come about due to good planning. Same is true in photography, videography, and advanced drone photography. Strategy and planning are essential steps for how to plan a drone photo shoot. 
For our examination of landscape photography with a drone, we’ll consider overall strategy and how to plan to reach the goal of your strategy.
Advanced Drone Photography Tips Planning and Strategy image

Table of Contents

Choose Strategy First

how to plan a drone photo shoot 1 image
Photo by Retha Ferguson from Pexels
Every stage of planning will depend on deciding on a basic strategy. Early on in our planning stage, we will choose if we are shooting video, still images, or a combination of both. If we are shooting video only, that will cause us to choose smoother flight modes. If we are shooting still images, we can fly quickly to get into position then stabilize for the shots. 
We can also decide ahead of time if we are shooting A-Roll or B-Roll for video, or what type of landscape still image we are wishing to capture. Do we want a high level scenic view? A point of view closer to ground level and the subject? Or something in between?
Once the basic overall strategy is determined, then we can start working on how to plan a drone photo shoot. The planning is where the details are.

Planning Details – The Beginning Stage

A good place to start with drone photography planning tips is to remind yourself of the capabilities and limitations of your drone photography gear. Thankfully, the newest drones have a lot of capabilities that we can incorporate into our overall strategy.
As a good example of this, if we look at the DJI Mavic line of drones, it’s more a matter of certain models adding extra features and capabilities than anything else.
how to plan a drone photo shoot 2 image  
The DJI Mavic Mini is a modest budget option drone that is also below the weight limit for certain restrictions and regulations concerning drone photography and flying. Yet, within its extremely light weight, it boasts features and capabilities that can capture high resolution still images and high quality video. 
It also has advanced flight modes for specialty images and video, plus a 30 minute battery range. Controlled from your own iPhone, this is a powerful choice either as your first drone or as a nice lower cost upgrade from an earlier generation drone.
how to plan a drone photo shoot 3 image  
Their mid-range option, the DJI Mavic Air 2, upgrades your capabilities with a larger sensor camera for even more resolution and higher quality video recording. It adds a faster top flight speed and slightly longer battery life, as well as even more sophisticated flight modes to give you more shooting or filming options.
how to plan a drone photo shoot 4 image
For professionals or anyone else requiring the highest quality imaging and video, it’s hard to beat the DJI Mavic 2 Pro with the best in class 20MP Hasselblad L1D-20c gimbal camera, improved flight performance, and live video remote feed from over 5 miles away. Just think of all you could do with that.

Plan Your Flight Around the Shots 

advanced drone photography tips 5 image
Photo by Max Ravier from Pexels 
When shooting landscape photography with a drone, the primary goal is to come back with great images or video footage. 
Some variables will need to be factored in. You can take these advanced drone photography tips in any order you desire, find a method or routine that works for you.

Storyboard Your Shots

advanced drone photography tips 6 image
 photo by Erdark via iStock 
Whether still imaging or shooting video, an important step is the storyboard. You could label it as a flight plan or a mapping out of your drone photography trek. It’s very close to our standard photo and video methodology of visualizing the results ahead of time and then finding a way to get to that desired end. 
In landscape photography with a drone, sometimes the mapping out is quite literal. You need to know where you’re going, what flight issues change and where that might happen, and what will show from your position at certain times of the day.

Check and Monitor Weather Conditions

drone photography planning tips 6 image
 photo by Ralph W. lambrecht via Pexels
Weather forecasts are a good resource. Another option is to monitor in real time with a smartphone app. If you’re going to rely on a phone app, you should check coverage in the shooting area. 
Some beautiful areas for drone photography are out of range of some networks. Besides the drone flight conditions, this is also a safety tip, especially if inclement weather may be  a possibility.

Pre-Flight Check 

drone photography planning tips 7 image
Photo by Kyle Loftus from Pexels 
You should have all of your gear clean, charged up, with imaging cards ready before you get to the location for your landscape drone photography. Before powering up to start flying and shooting, check it all again. 
Few things are more disappointing than coming back with bad images or nothing at all. A pre-flight check as part of your regular routine will help minimise the danger of that happening.
A pre-flight checklist is also part of the regulations for certain categories of drones, which you already know because of passing the certification for those drones.

Fly Through / Shoot Through

landscape photography with a drone 8 image
Photo by Nick Kwan from Pexels 
Especially if your landscape drone photography includes video footage, you will benefit from this tip. Begin filming before your storyboard start point and keep filming after your scene. This gives you some extra video to work with in editing. 
It can make the transitions go smoothly and you don’t accidentally miss anything you planned on capturing. “Lights, Camera, Action” is in that order for good reason. Set exposure and flight mode, start recording, and then fly your drone through the shoot.

Shoot Extra and Edit

drone photography 9 image
 photo by Huseyin Bostanci via iStock
Another of the advanced drone photography tips that doubles as a drone video tip is to shoot more and edit it down. This is not a Spray and Pray style of shooting, where you just keep filming and hope you get to capture something good. 
Each of your drone photography shots or video scenes can have the potential of being the game winner. Giving ourselves more to work with allows for a possibly more discerning editing session.
Having good editing habits will increase our capabilities and consistency a lot more than most equipment upgrades will give us. We have a lot of options for tutorials and training, plus experience will teach us as well. 

Make It Fun

drone photography 10 image
 photo by DisobeyArt via iStock 
Even pro baseball players tell me they have fun doing their job. Drone photography is very enjoyable. Just look at all the articles we write about it. 
Learn what you need, then get out and shoot. Develop a strategy, plan it out, and enjoy the ride.

This article about “Advanced Drone Photography Tips: Planning and Strategy” was first published on our website here https://www.photographytalk.com/advanced-drone-photography-tips-planning-and-strategy

Source: https://photographytalkcom.blogspot.com/2020/08/advanced-drone-photography-tips.html

Drone Photography Composition Tips

Drone photography is an absolutely exhilarating experience. Drones allow for truly stellar shots, providing you with the opportunity to shoot angles and perspectives previously only accomplished with helicopters.
From a composition standpoint, the process of capturing stunning visuals with a drone is more complex. Due to the nature of a drone, there are a multitude of ways to shoot a particular subject. Approaching from above, sweeping left to right, coming up from below — all of these result in a different final image.
However, there are some basic composition tips that will help you create great drone photos.
iStock 887327548 min image
Editor’s Tip: Want to get equipped for drone photography? Our friends at Adorama have a complete line of drones to fit just about every budget. We highlight DJI drones in this article, but to explore other drones in more detail, visit Adorama. Also be sure to check the learn more links in this article for more details on improving your drone photography.

Add People to the Shot

iStock 803644064 min image
Our eyes are trained to see images of other people. That’s true even if they are quite small in the frame. By adding people to your drone photos, you give viewers something with which to immediately connect. Including people also helps the viewer understand the scale of the shot. 
In looking at the image above, you get a sense of just how high up the drone is based on how small everyone is in the frame.
This photo also illustrates the value of repetition – the pattern of the umbrellas makes this shot much more visually appealing.
mavic mini gimbal image
Bonus Tip: Take multiple photos of the same subject from different points of view. Doing so is made easy by utilizing shooting modes, like Dronie, Circle, Helix and Rocket modes that are available on the DJI Mavic Mini.

Look for Color

iStock 865192838 min image
Color adds drama and dimension to every picture, especially those shot with a drone.
With such a wide view of the landscape below, drone photography is rife with opportunities to show off vibrant colors and gorgeous contrast to delight the eye.
The photo above of the fall colors is a prime example of this. The red, orange, and yellow tones of the foliage give the landscape life and vitality that make this an eye-catching shot.
iStock 612243340 min image
Sometimes a captivating shot engages the viewer with only a few colors.
In this image, the dark green water and the black sand give this shot some dark moodiness while the bright white of the waves draws you in.
In this case, although only three colors are captured, the resulting image is completely engrossing.

Leading Lines Give the Shot Structure

iStock 605753012 min image
Using leading lines in landscape photography is a tried-and-true method for giving your images more dimension.
The same goes for drone-based photography…
Pus, leading lines help the viewer’s eye move through the shot in a more purposeful manner.
The road in the shot above is an ideal example of this: it brings your eye from the foreground, to the midground, and finally to the background.
Even the long shadows cast by the features of the landscape help move your eye from the front to the back of the shot.
mavic 2 zoom image
Bonus Tip: Some drones, like the Mavic 2 Zoom, enable you to get much closer to interesting details in the landscape below. It is equipped with a 4x lossless zoom to capture beautiful detail from longer distances without sacrificing image quality. Features like this can be wildly helpful as you seek to compose more interesting photos (and videos too!).

Textures Help Create a Three-Dimensional Look

iStock 624678238 min image
Part of the struggle with any type of photography is trying to capture the depth and dimension of three-dimensional subjects in a two-dimensional medium.
To avoid flat-looking drone photos, look for opportunities to incorporate texture into the shot.In the image above, the chunky, rectangular blocks on either side of the road create a texture that’s both interesting to look at and provides much-needed depth to the shot.
That depth is created in part by the angular lines of each block and by the contrast between the pale color of the blocks and the shadows.
Note how this image combines the two tips outlined above – leading lines and color.
Try these drone photography composition tips by themselves or all together and see how they can improve the quality of your images.

This article about “Drone Photography Composition Tips” was first published on our website here https://www.photographytalk.com/beginner-photography-tips/drone-photography-tips

Source: https://photographytalkcom.blogspot.com/2020/08/drone-photography-composition-tips.html

Canon Lens Terms You Need to Know

EF, STM, USM, IS…there are a ton of acronyms that Canon uses to describe different features on their lenses.
But what do they all mean, and why are they important?
In this Canon lens terms guide, you’ll learn what some of Canon’s most often used acronyms mean so you can make a more informed purchase next time you’re in the market for a new lens.
canon lens terms you need to know image

Canon Lens Term: EF, EF-S, EF-M, and RF Indicate the Type of System for Which the Lens was Designed

canon lens terms ef image 
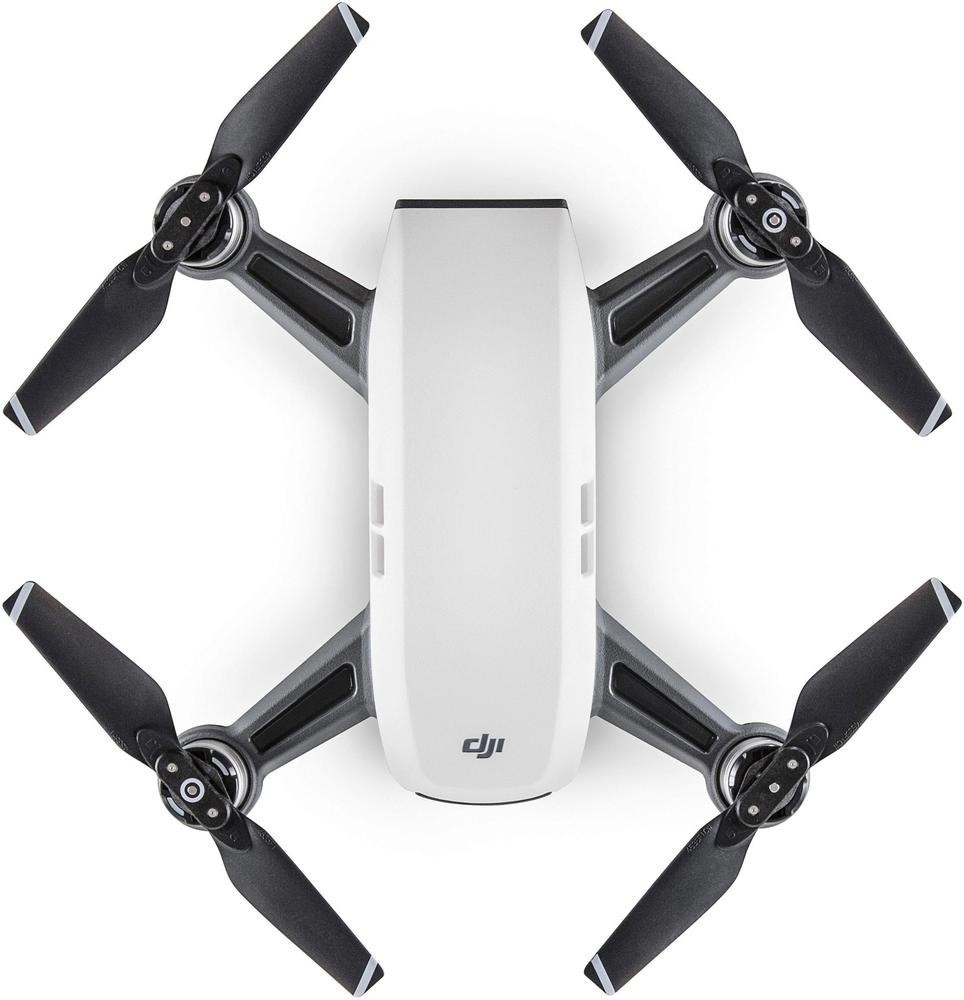
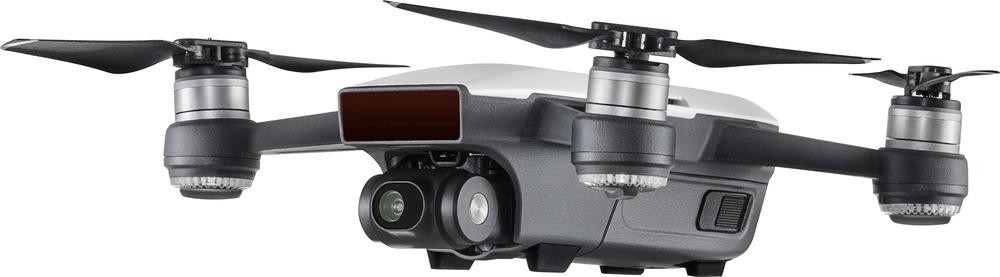
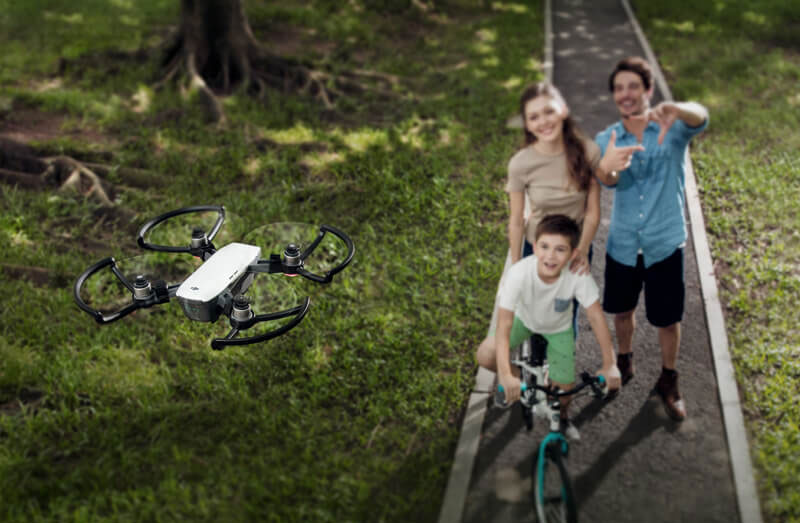
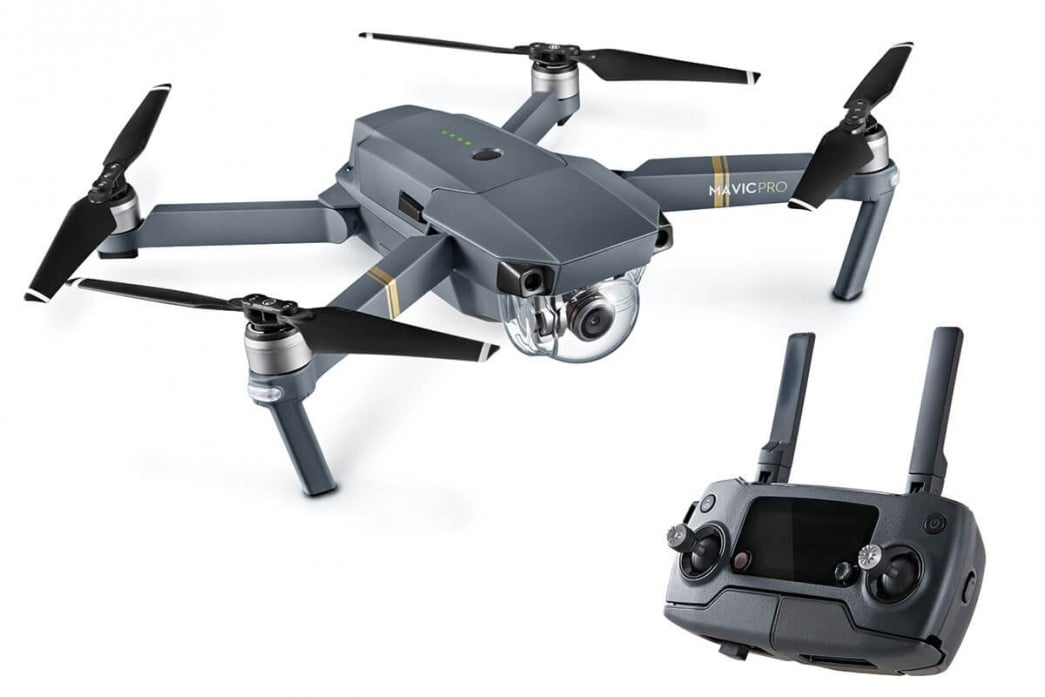
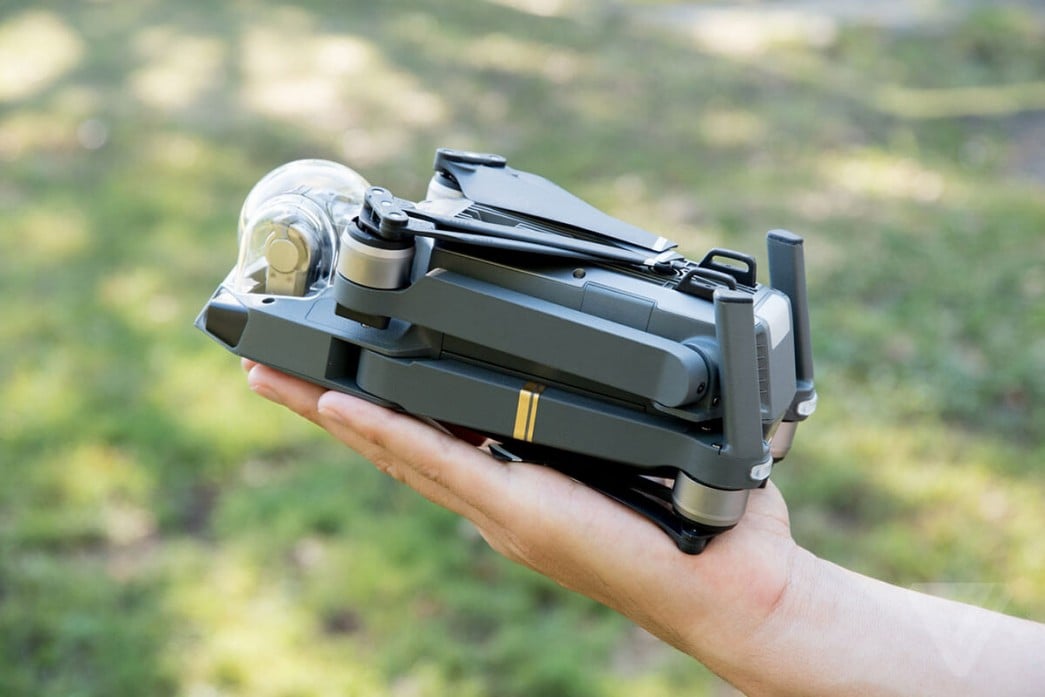
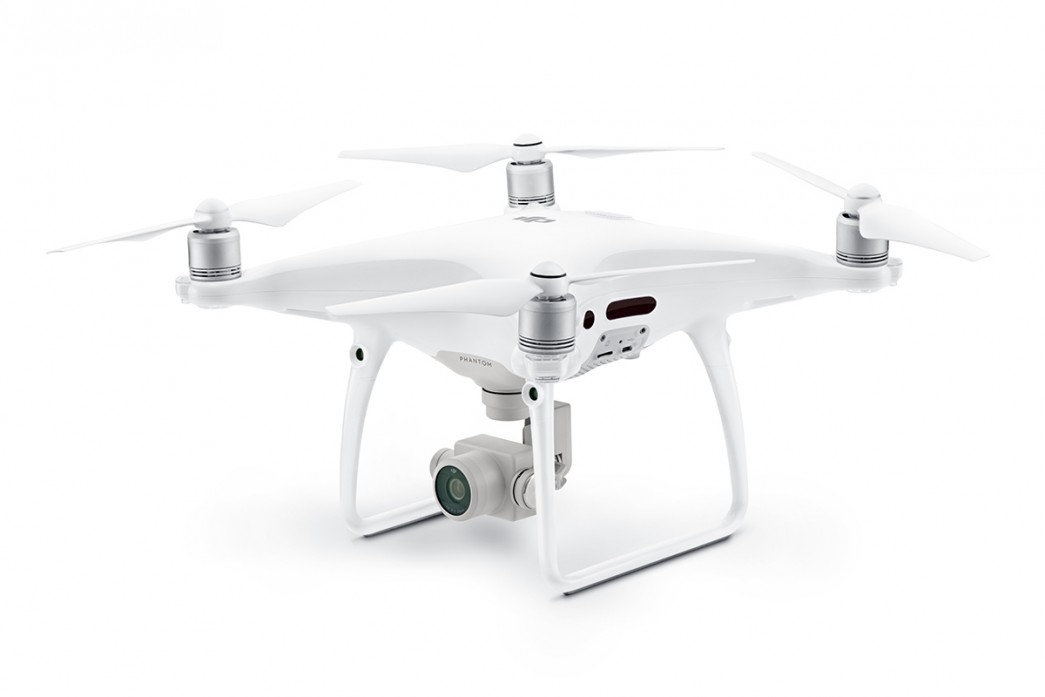
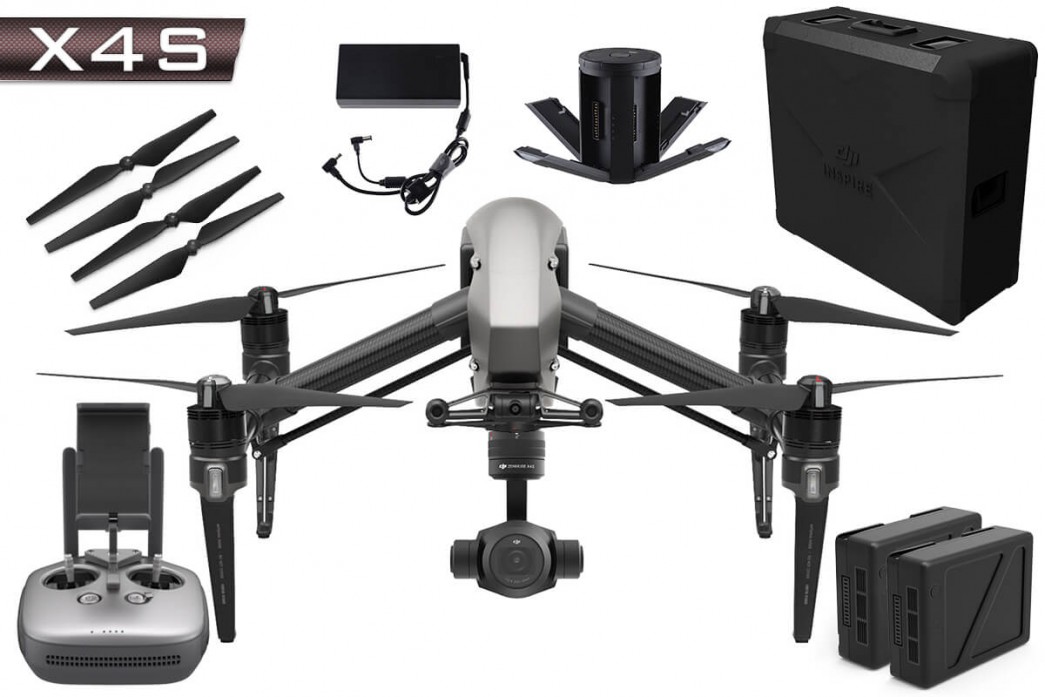
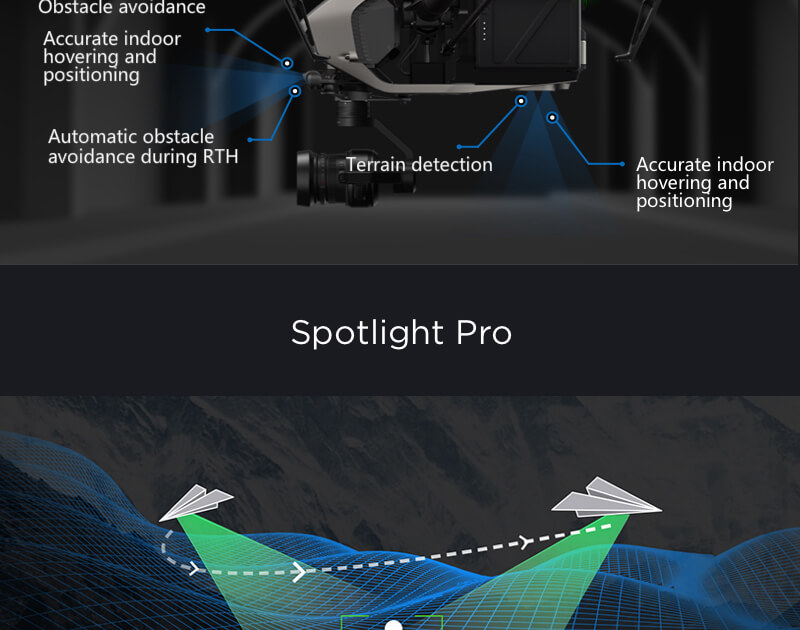
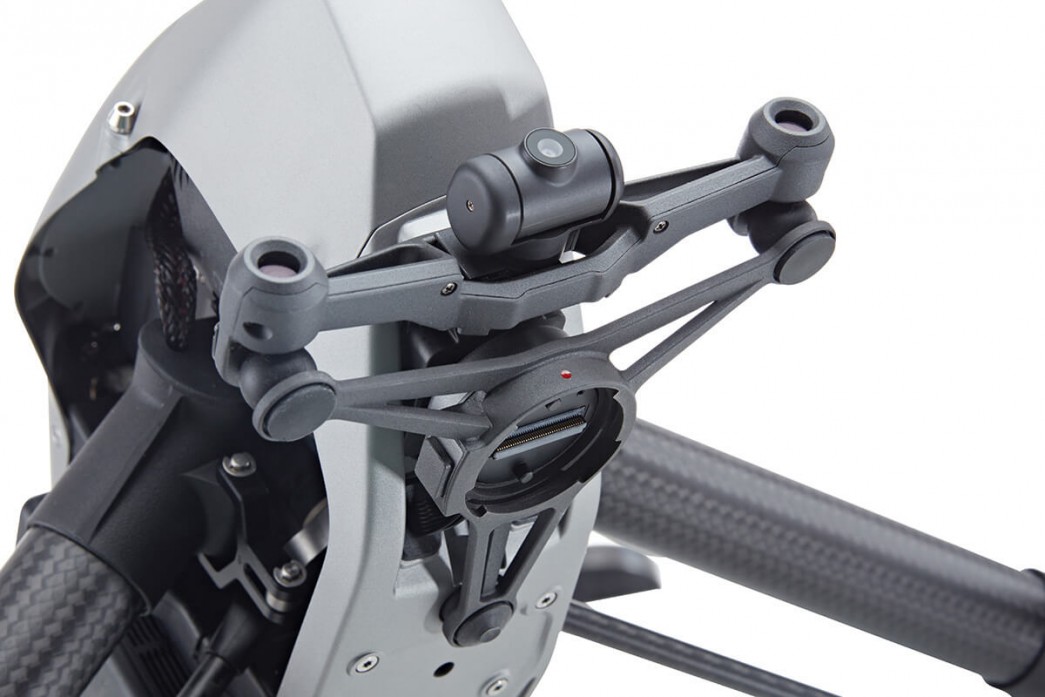
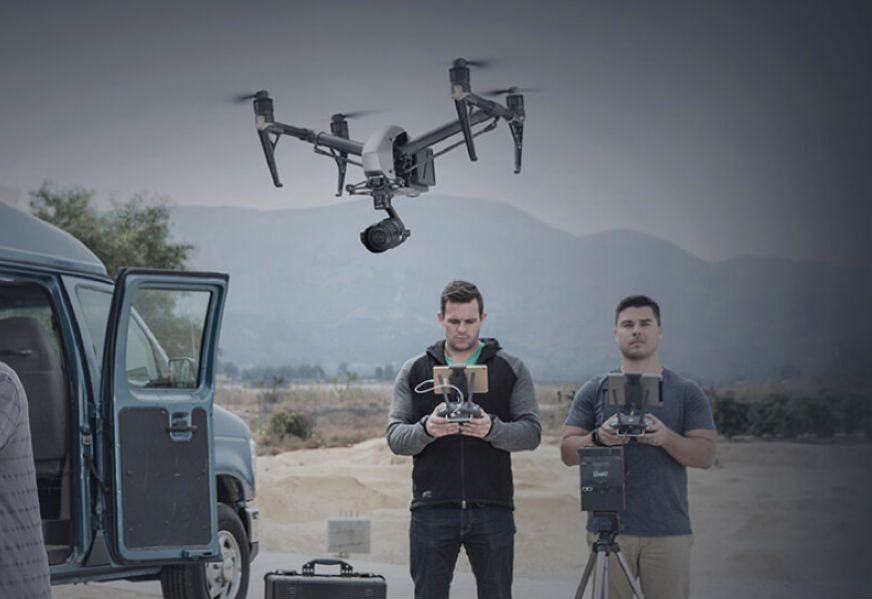
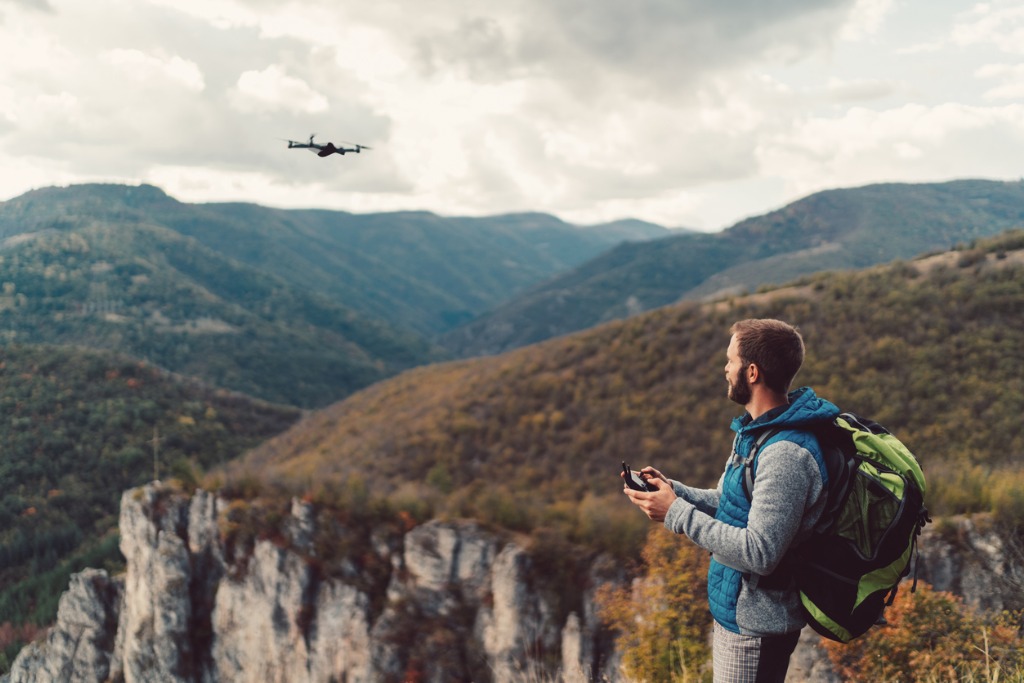
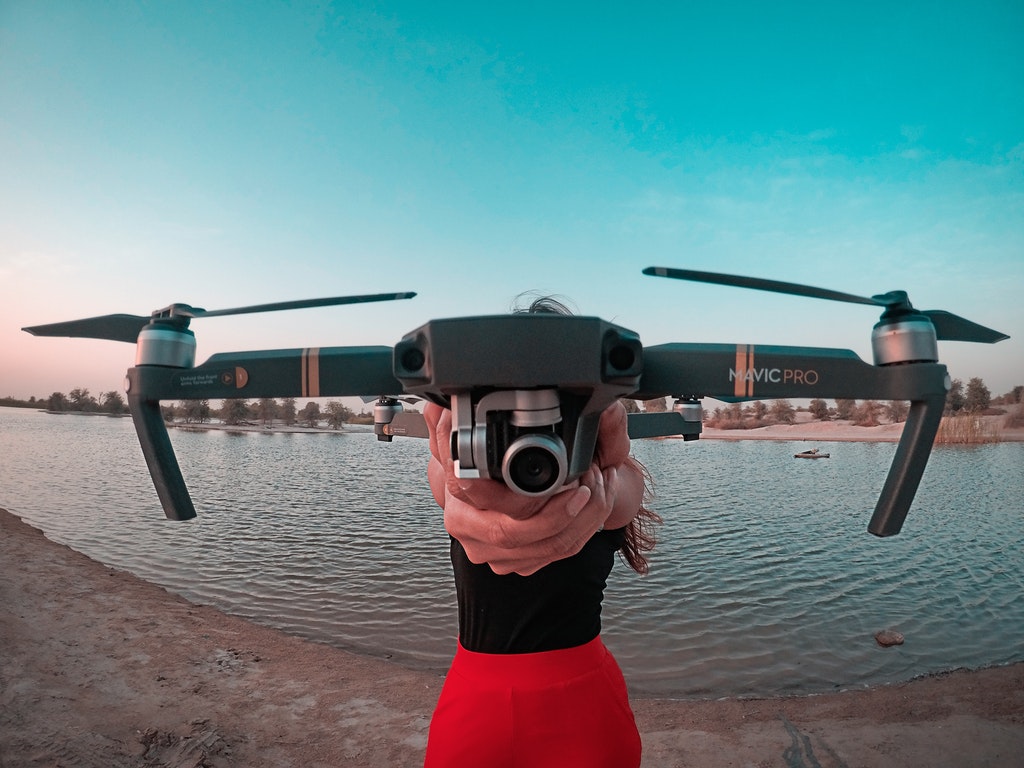
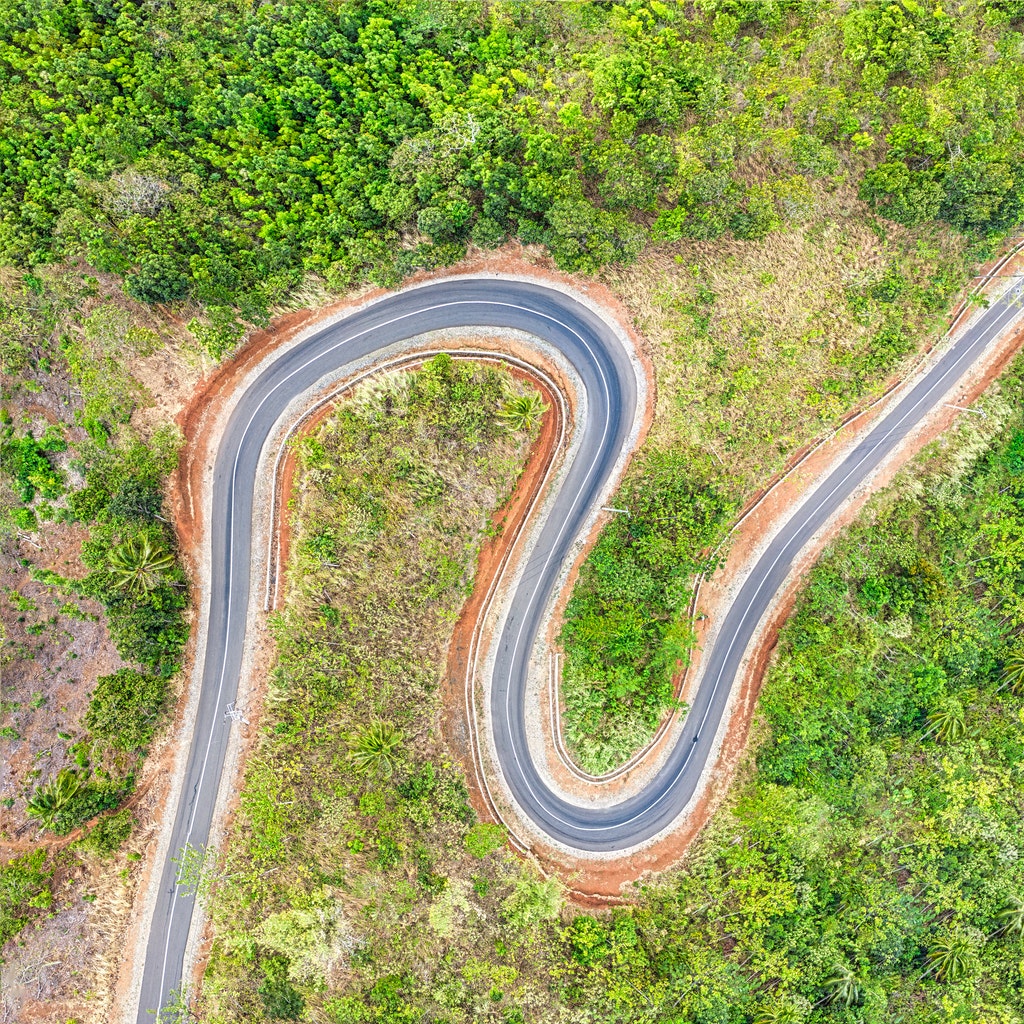
Photo by NeONBRAND on Unsplash
In Canon parlance, EF means “electro-focus” whether the lens is EF, EF-S, or EF-M. This means the camera controls the lens’s focusing system.
The addition of the S and M designations indicates the Canon camera system for which the lens was designed.
So, EF lenses (like the one shown above) are designed for use with Canon full frame cameras, though EF lenses can also be used on crop sensor cameras as well as EOS-M cameras, so long as you have an adaptor.
canon lens terms ef s image Photo by Dollar Gill on Unsplash
EF-S lenses (like the one shown above) are built for usage with Canon’s crop sensor cameras. These lenses can only be used on crop sensor cameras.
EF-S lenses are often smaller than their EF counterparts, and are typically also less expensive as well.
EF-M lenses are specially designed for the EOS M system. They are smaller still than EF and EF-S lenses and can only be used with EOS M cameras.
The newest Canon lens type is the RF mount lens, which is designed for use with Canon’s EOS R mirrorless system.
The RF lenses only work on EOS R cameras, though you can buy an adapter that allows you to use EF lenses on an EOS R camera.

Canon Lens Terms: STM and USM Indicate the Canon Lens Motor Types

canon lens terms stm image Photo by Maxime Agnelli on Unsplash
Most Canon lenses have an Ultrasonic Motor (USM), which is named as such because the lens converts ultrasonic vibration into rotational force.
Not only does this result in improved focusing for sharper images, but it also results in quieter focusing when shooting still images and improved speed with which the lens can acquire focus.
Canon’s stepping motor (STM) design, on the other hand, is better suited for shooting video.
STM motors are extremely smooth and incredibly quiet, so when shooting video you hear the subject of the video rather than the lens working to acquire focus.

Canon Lens Terms: IS Lenses are Stabilized

canon lens terms is image Photo by William Bayreuther on Unsplash 
Canon lenses with the IS designation are image stabilized, meaning the lens has stabilization built into it rather than having to rely on in-body image stabilization in the camera.
Image stabilization is advantageous because it allows you to use a slower shutter speed (up to four or five stops more) when handholding the camera with less incidence of motion blur. Most Canon telephoto lenses (like the one shown above) have IS as these longer lenses are more susceptible to camera shake.
Image stabilization is achieved by elements inside the lens that move to compensate for movement induced by the photographer. The result is sharper images when shooting handheld.

Canon Lens Terms: L Stands for Luxury

canon lens terms l series image Photo by Tom Pumford on Unsplash
Canon’s top-of-the-line lenses have the L designation, which stands for luxury.
These lenses are designed for professionals and have improved optics (like ultra-low dispersion elements), wider apertures (for improved background blur and low-light shooting), and weather sealing that keeps dust and water out of the lens.
As you can see above, L-series lenses have a red ring around the barrel near the end of the lens. You can also see the EF and L designations on the lens barrel.
Quick Tip: Canon lenses often have a II or III in their name. These numerals indicate the generation of the lens.

This blog post about “Canon Lens Terms” was first published on our website here https://www.photographytalk.com/canon-lens-terms

Source: https://photographytalkcom.blogspot.com/2020/08/canon-lens-terms-you-need-to-know.html

Brett Harkness Canon Photography Review:The Canon EF 16–35mm f/2.8 L IS II USM Zoom Lens

As one of the most sought-after social/wedding photographers in the UK and across the globe, Brett Harkness knows Canon cameras and lens very well, since they are the only equipment he uses. PhotographyTalk is pleased to share Brett’s insights and honest appraisals of Canon products.
Brett scores the Canon EF 16–35mm f/2.8 L IS II USM zoom lens 7 on a scale of 1 to 10.
Canon_EF_lens image
I use the Canon EF 16–35mm f/2.8 L IS II USM zoom lens for most of the jobs I shoot. I think of it as my “scene setter” lens. It is a great lens for shooting large groups at apertures of f/8–f/11. I’ve discovered that this Canon zoom lens is a little soft at the edges, especially at larger apertures: approximately f/2.8–f/4, although it’s a vast improvement compared to the I model.
To be honest, I mostly use this lens for my “ big flash” shots when I want to include much of the scene as well as the wedding couple. For these images, I tend to select f/11–f/16. Honestly, the alternative Canon EF 17–40mm f/4 L lens would be worth considering, especially since it is half the price! I know some photographers who tape the 16–35mm f/2.8 at 35mm, so it is more useful.
These are my opinions on how I use this lens every day of my life. If it feels good in my hands, then I use it! This equipment is an extension of my eye and how I see my world and the social world within which I work. That was why I started to use Canon products more than 20 years ago. If a piece of equipment allows you to capture your vision, then use it. It is only when a piece of equipment is a hindrance that you should change it.
If you would like to see more examples of my work please go to www.brettharknessphotography.com.
You can also join me on Facebook, Twitter (@brettharkness), Instagram and Flikr. You’re also invited to visit our wonderful training site with a host of information to watch, read and download: www.brettharknessphotography.com/training
The opinions in this article are those of Brett Harkness and are not necessarily endorsed by PhotographyTalk.
About Brett Harkness: Brett Harkness is a highly regarded UK photographer, who, with Kristie, his wife and business partner, specialize in in all forms of social photography, both studio and outdoors, in the UK and overseas. Brett was born during 1972, and was graduated from Nottingham Trent University, where he studied photography. He spent the next 5 years working on board cruise ships in America and the Caribbean, where he learned the basics of working with a great diversity of people, as he photographed their vacation activities as guests. Couples around the globe seek Brett’s signature style for their wedding photography. He and his wife operate a studio and training facility in a converted wood mill outside of Manchester, England. They offer courses in lighting, lifestyle, and wedding photography.

This article about “Brett Harkness Canon Photography Review:The Canon EF 16–35mm f/2.8 L IS II USM Zoom Lens” was first published on our website here https://www.photographytalk.com/photography-equipment-reviews/2559-brett-harkness-canon-photography-review-the-canon-ef-1635mm-f28-l-is-ii-usm-zoom-lens

Source: https://photographytalkcom.blogspot.com/2020/08/brett-harkness-canon-photography.html

7 Reasons the Canon EF 300mm f/2.8L IS Lens is a Legend

Few, if any, lenses have the legendary status of the Canon EF 300mm f/2.8L IS among professional sports, action, wildlife, landscape and portrait photographers. First released during 1999, it’s safe to say that this Canon telephoto lens has made many photographers legends too. Canon upgraded the 300mm f/2.8L IS to the IS II model during August 2010, but for approximately $6,800 compared to the older model at approximately $4,500, you must be a well-established pro, who needs all the newer model delivers, to justify the investment.
Want to see reviews from other photographers? Check them out here.
Canon_EF_300mm_f2_8L_lens image
  • Despite its age, the 300mm f/2.8L IS has a reputation for being very usable at its widest aperture, which produces exceptionally sharp resolution throughout the entire surface of an image, from the center to the full-frame corners.
  • The fast speed of this lens is a winner with sports and wildlife photographers because of the excellent bokeh that is produced at f/2.8 and the total compression of a 300mm focal length. Shooting sports with a distracting crowd background or a wild animal in a busy natural environment is easily controlled, creating an excellent effect of depth between the subject and background. Portrait photographers are also able to generate excellent images with the bokeh and compression this lens creates.
  • The optical qualities of the Canon EF 300mm f/2.8L IS are nothing short of amazing, rendering colors, true and rich, and contrast, balanced and natural. The lens contains 17 glass elements in 13 groups as well as one fluorite and two UD elements for supreme control of chromatic aberration. The optics in this lens also minimizes light fall-off, creates difficult-to-see distortion and reduces the effect of flare to a point of non-existence.
  • Landscape photography with a telephoto lens is an interesting variation from the tried-and-true use of a wide-angle lens. The EF 300mm f/2.8L is virtually the perfect lens for shooting landscapes with a compressed view. The fast aperture allows the landscape pro to capture those most magical of images that typically occur when the light is low.
  • Sports, wildlife and any pros shooting action subjects have proven the Canon’s image stabilization technology in this lens to be an important part of its legend. The “standard” IS allows photographers to take very sharp handheld photos of subjects moving slowly, while the IS Mode 2 specifically supports panning. In either case, the IS provides approximately 2 stops of faster shutter speeds, meaning you can handhold it at 1/125 or slower. Many photographers couldn’t succeed at their craft without the added tripod-sensing capabilities of the IS system. The lens recognizes when it (and the camera) is attached to a tripod and activates the secondary IS mode to compensate for smaller vibrations and movements, such as mirror slap, shutter release, etc.
  • Although the Canon EF 300mm f/2.8L IS has a bit of heft and size, it is the second lightest and smallest of Canon’s fixed focal length telephoto lenses. At 5.6 lbs. (2.55kg) and 5.0 x 9.9” (128 x 252mm), it isn’t the kind of lens to be attached to a full-size DSLR and carried around your neck. The pros know, however, that to capture the outstanding images they’ve envisioned it’s worth it to carry a bag or pack that will accommodate this lens.
  • Part of the EF 300mm f/2.8L’s weight and size can be attributed to its excellent build quality. Even then, Canon has used high quality magnesium alloy both to reduce some of the weight and make this lens as tough as some of the places pros take it. It has also been carefully weather-sealed, which includes the mount point when attached to an equally sealed Canon camera.
Because of its age, the best place to purchase the Canon EF 300mm f/2.8L IS lens is from the Canon Web site. You may also be able to find it refurbished, but make sure it’s from a reputable dealer. If you can justify the price tag, then the upgraded IS II model is available from Amazon for $7,268.98.

This bog post about “Canon EF 300mm f/2.8L IS Lens” was first published on our website here https://www.photographytalk.com/photography-equipment-reviews/2628-7-reasons-the-canon-ef-300mm-f28l-is-lens-is-a-legend

Source: https://photographytalkcom.blogspot.com/2020/08/7-reasons-canon-ef-300mm-f28l-is-lens.html